Slipcovering Tips


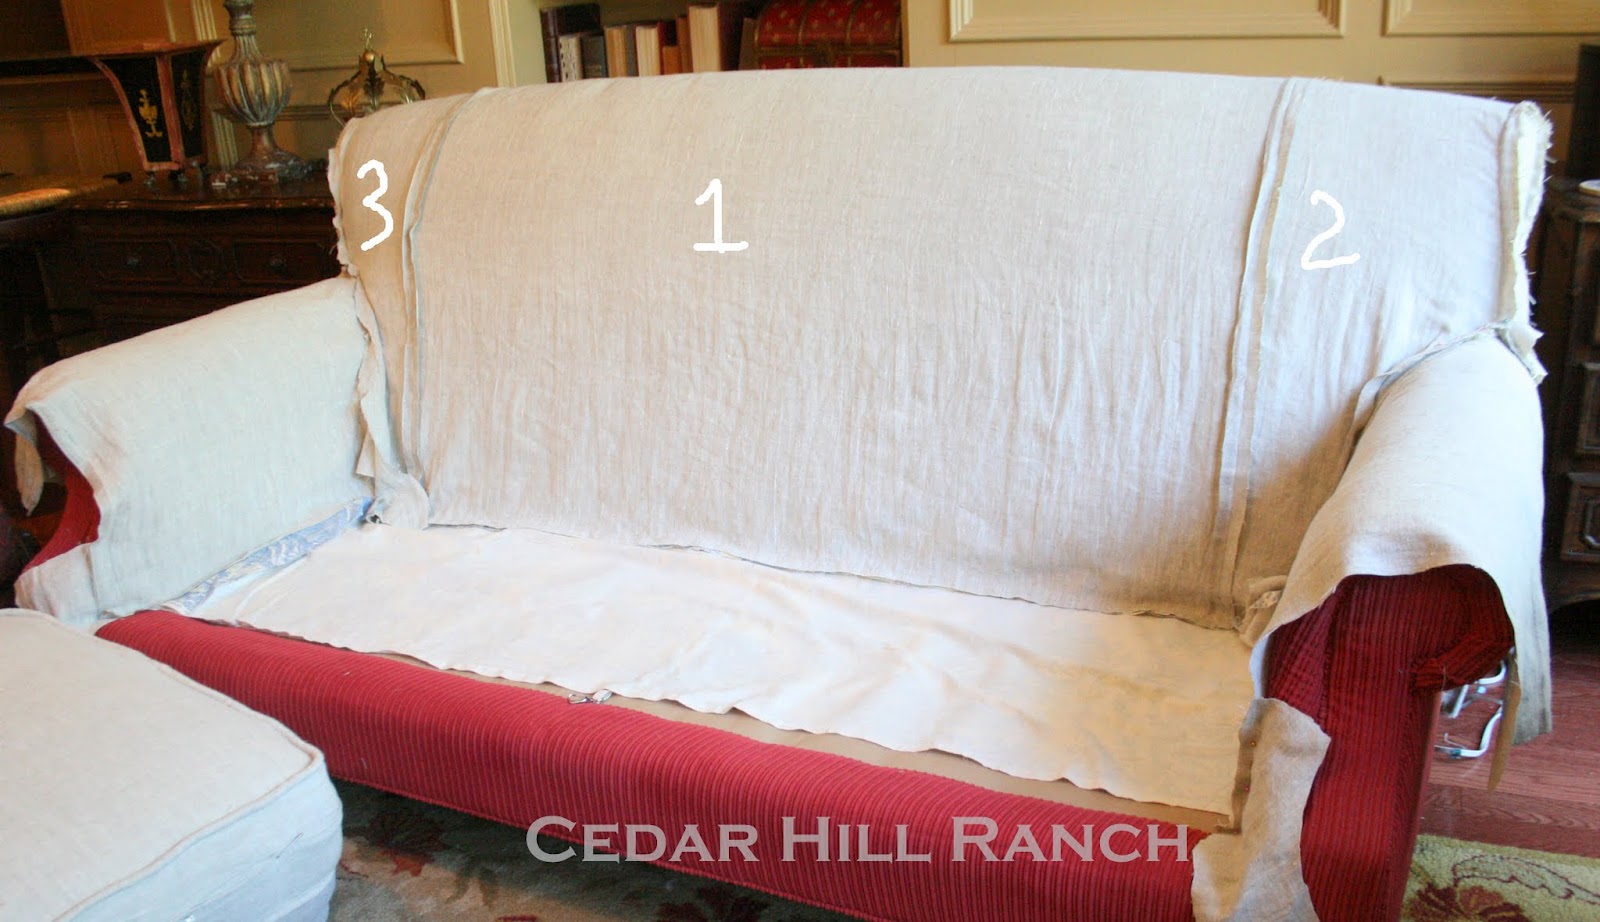
3. If the width of your furniture is wider than your fabric, don’t use a center seam. Center one width of fabric and add equal amounts of fabric on either side.
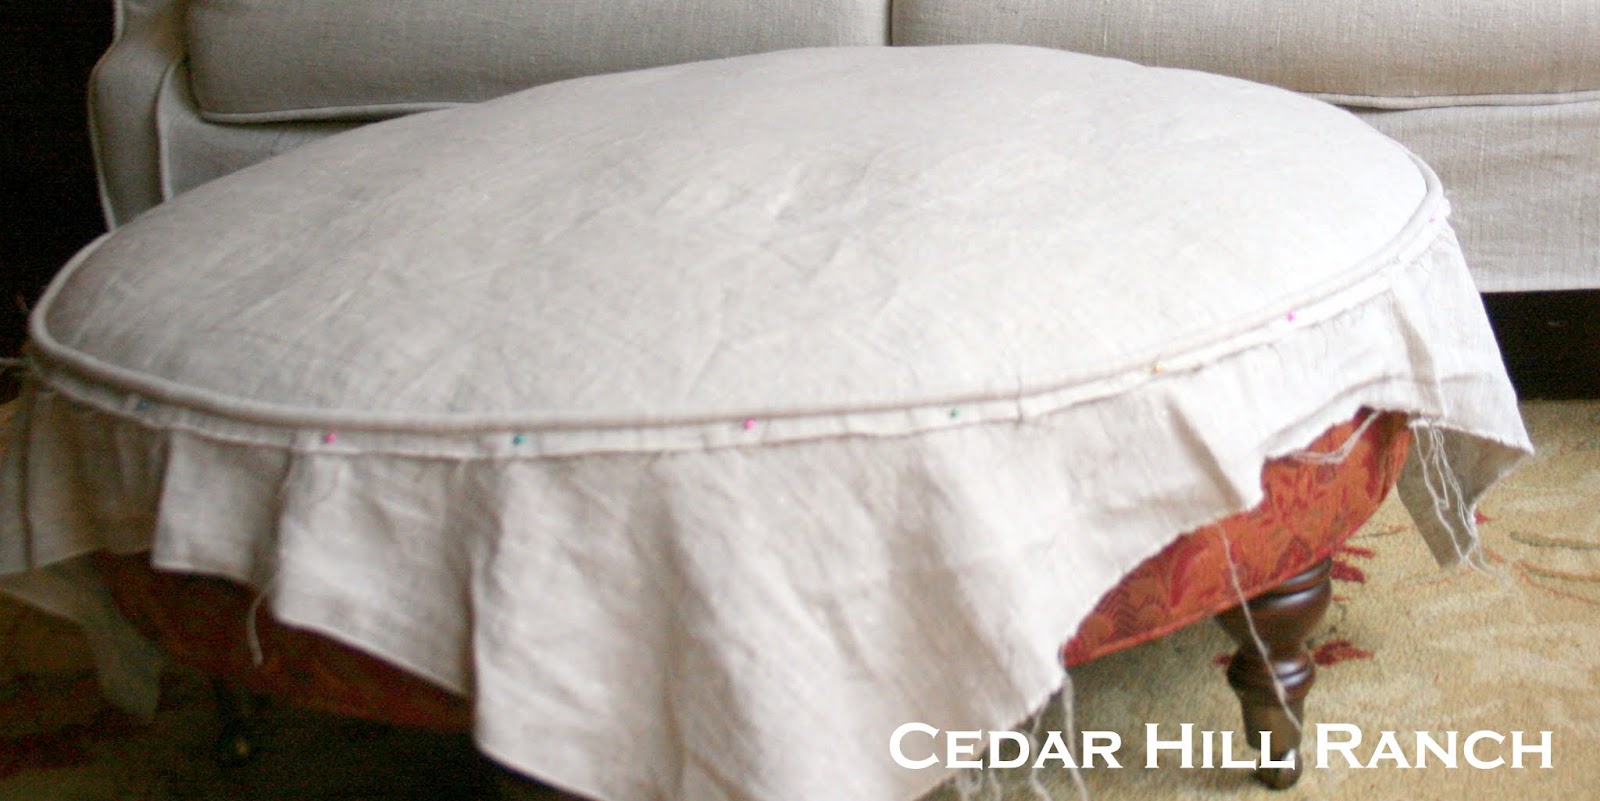
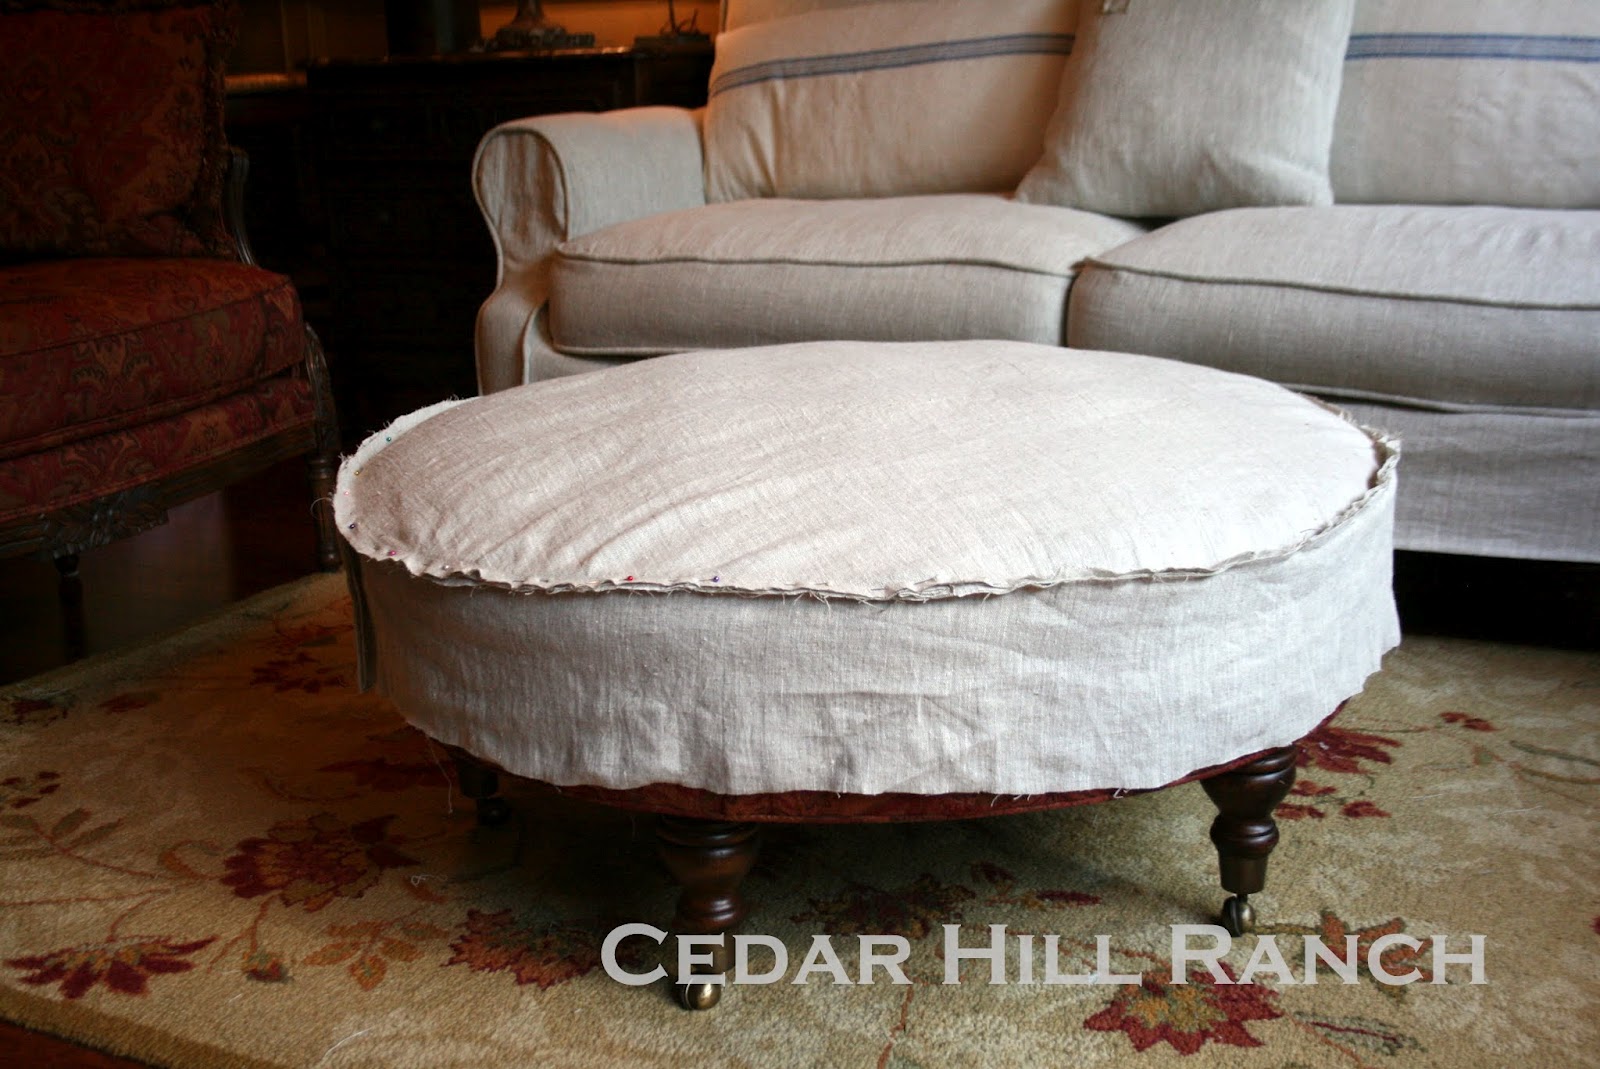
4. Form your slipcover onto of the furniture you are slipcovering. Follow the form of the piece. Here I pinned the piping following the curve of the ottoman
5. Trim your seams. As you sew on piping or sew new sections of fabric onto your slipcover, trim off the excess fabric or it will be bunchy.
7. Always have the grain of the fabric going up and down never across your furniture. The exception is the arms, where the grain goes across the arms.

8. Try to use piping on the slipcover where it is on the furniture, although you may need to make some adjustments.

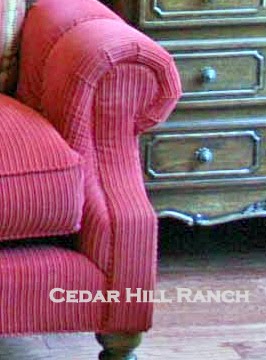
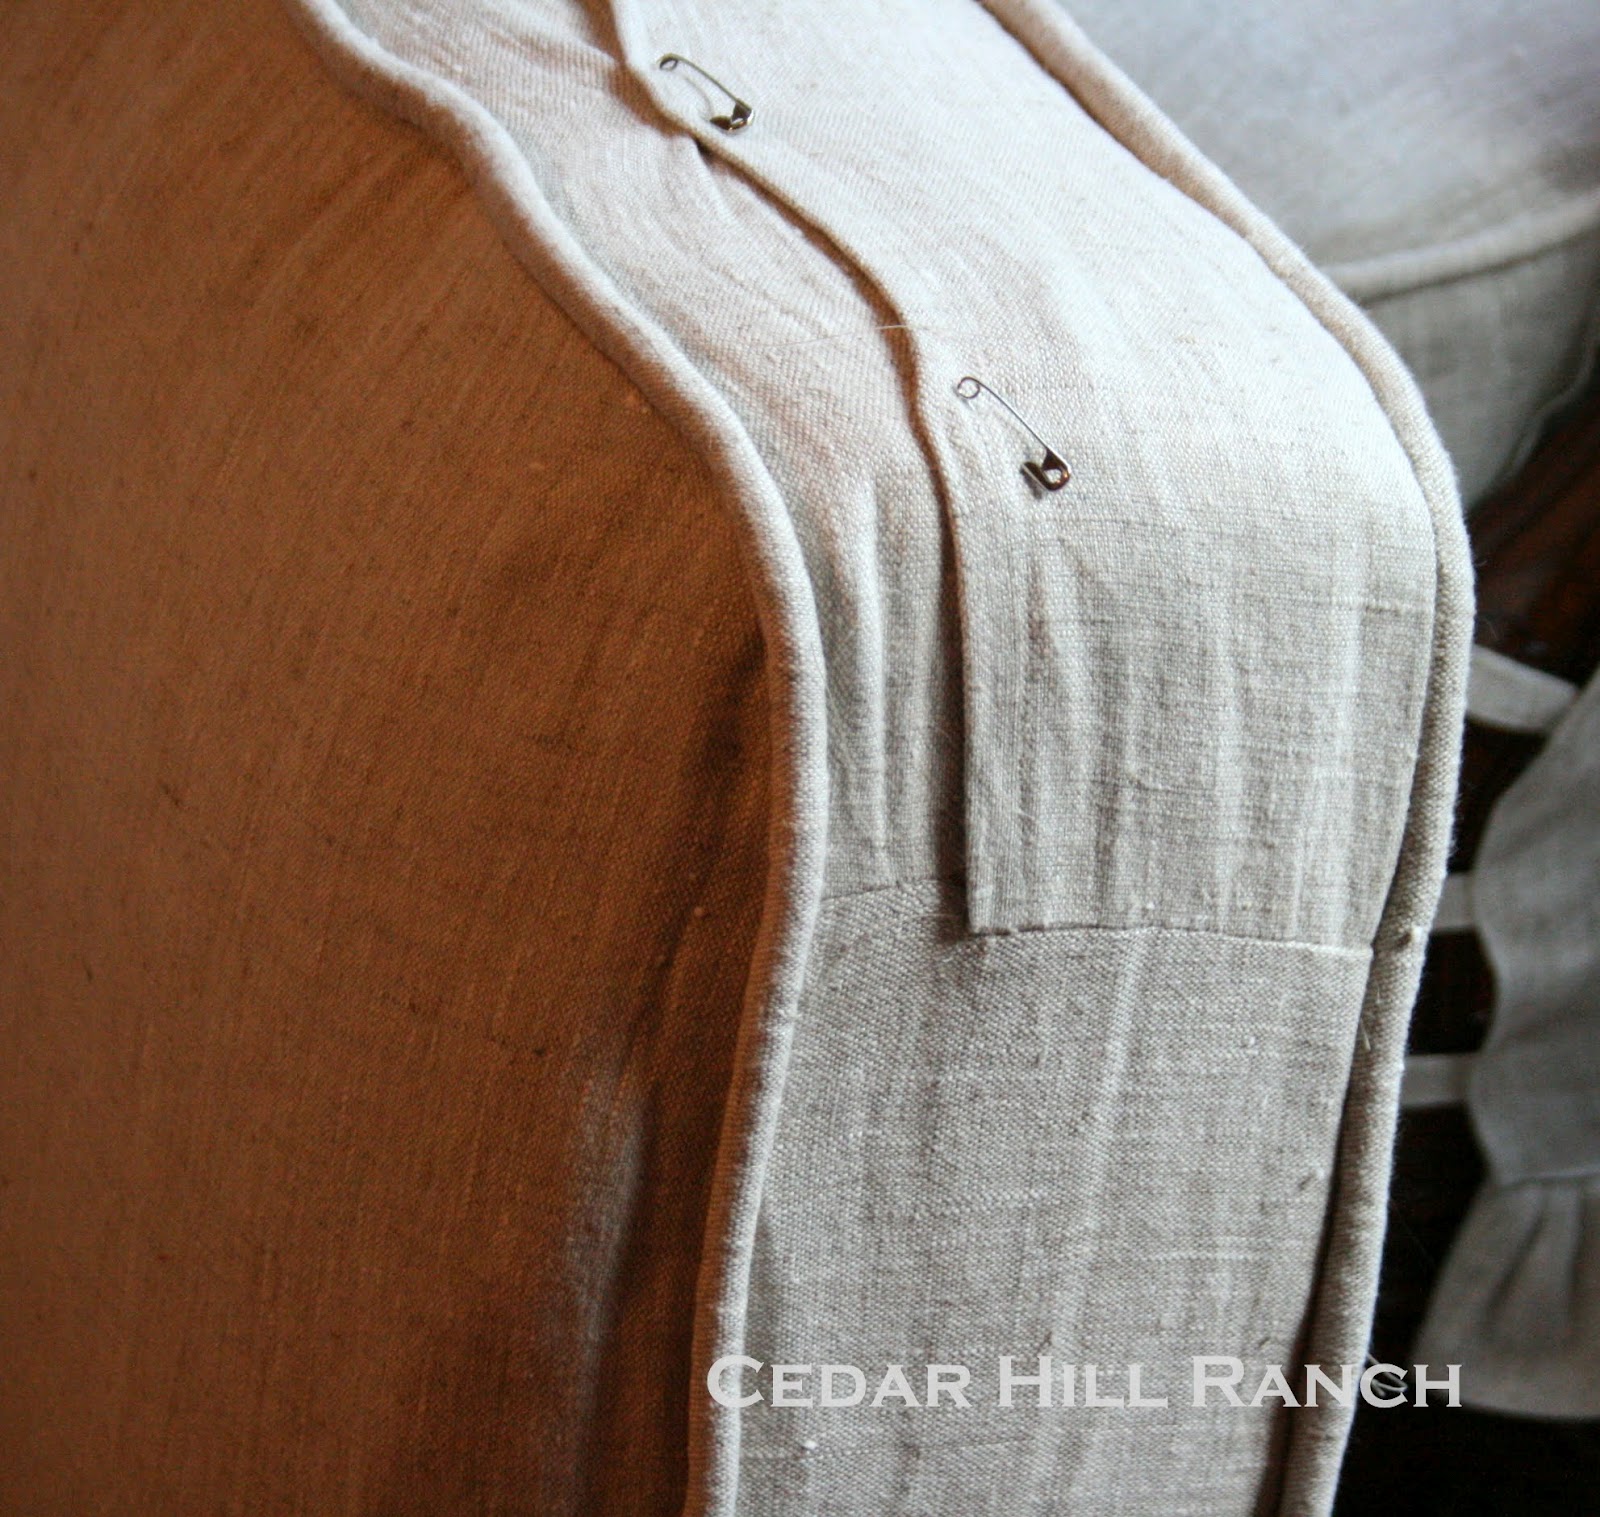
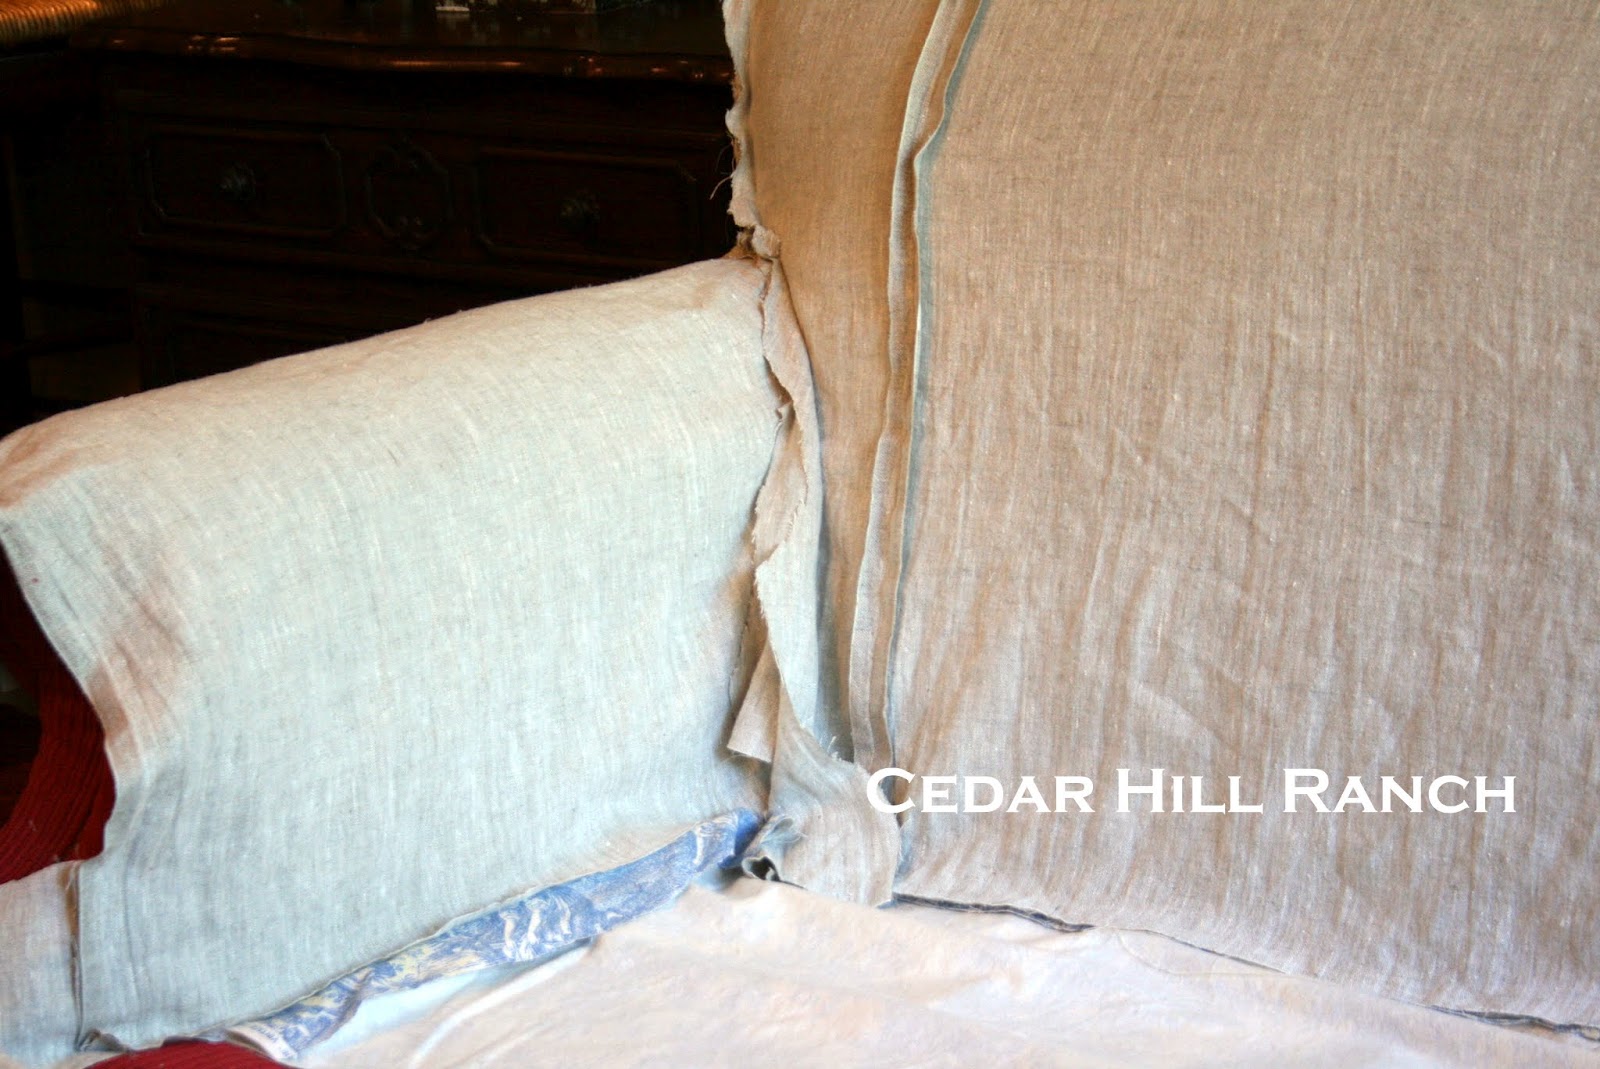
9. Use piping as your sewing guide. Always pin the piping on the slipcover while the slipcover is on the furniture, and follow the curves. So for the piece below, I would have pined the piping on the side piece of fabric first, and then basted the piping in place. Then when I sewed that side piece onto the slipcover, I would make sure that the basting seam was facing up so I could see where it was, as I sewed. So, if you can see your basting stitches follow them as you sew. If you can’t see them, take your work and turn it upside down. Now you should be able to see the basting, and you can follow the stitching when you sew.

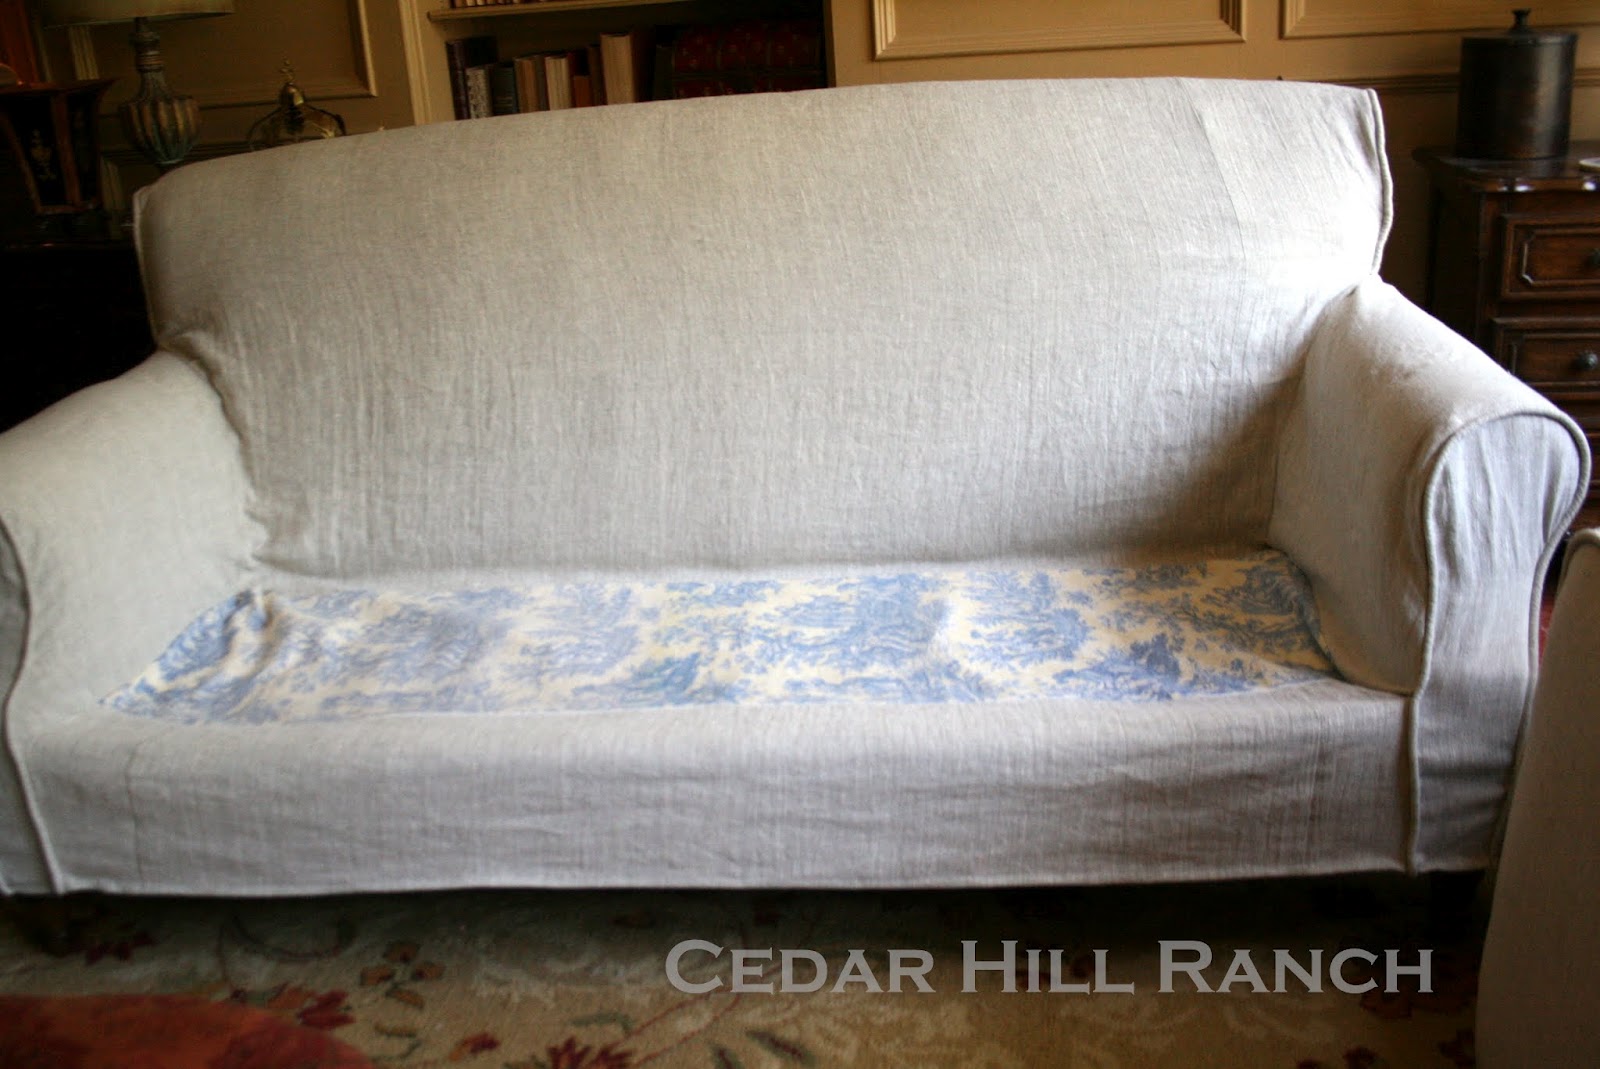
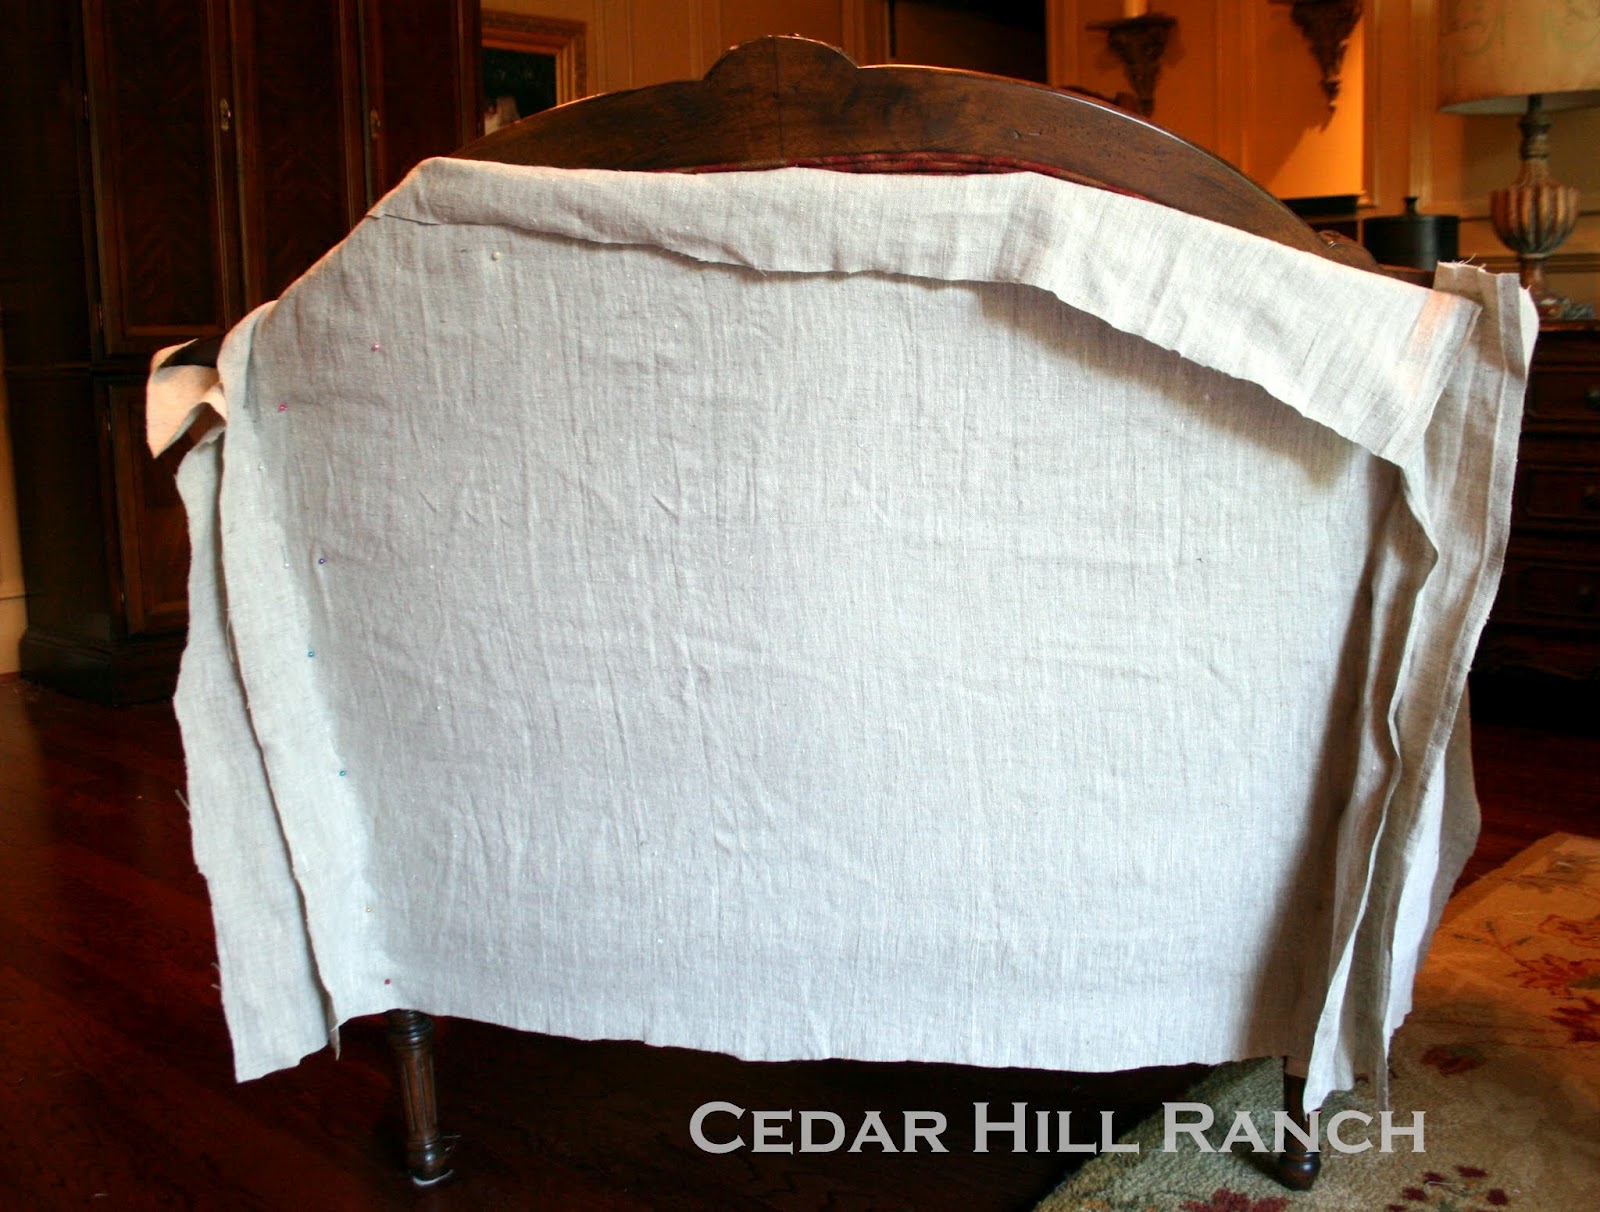
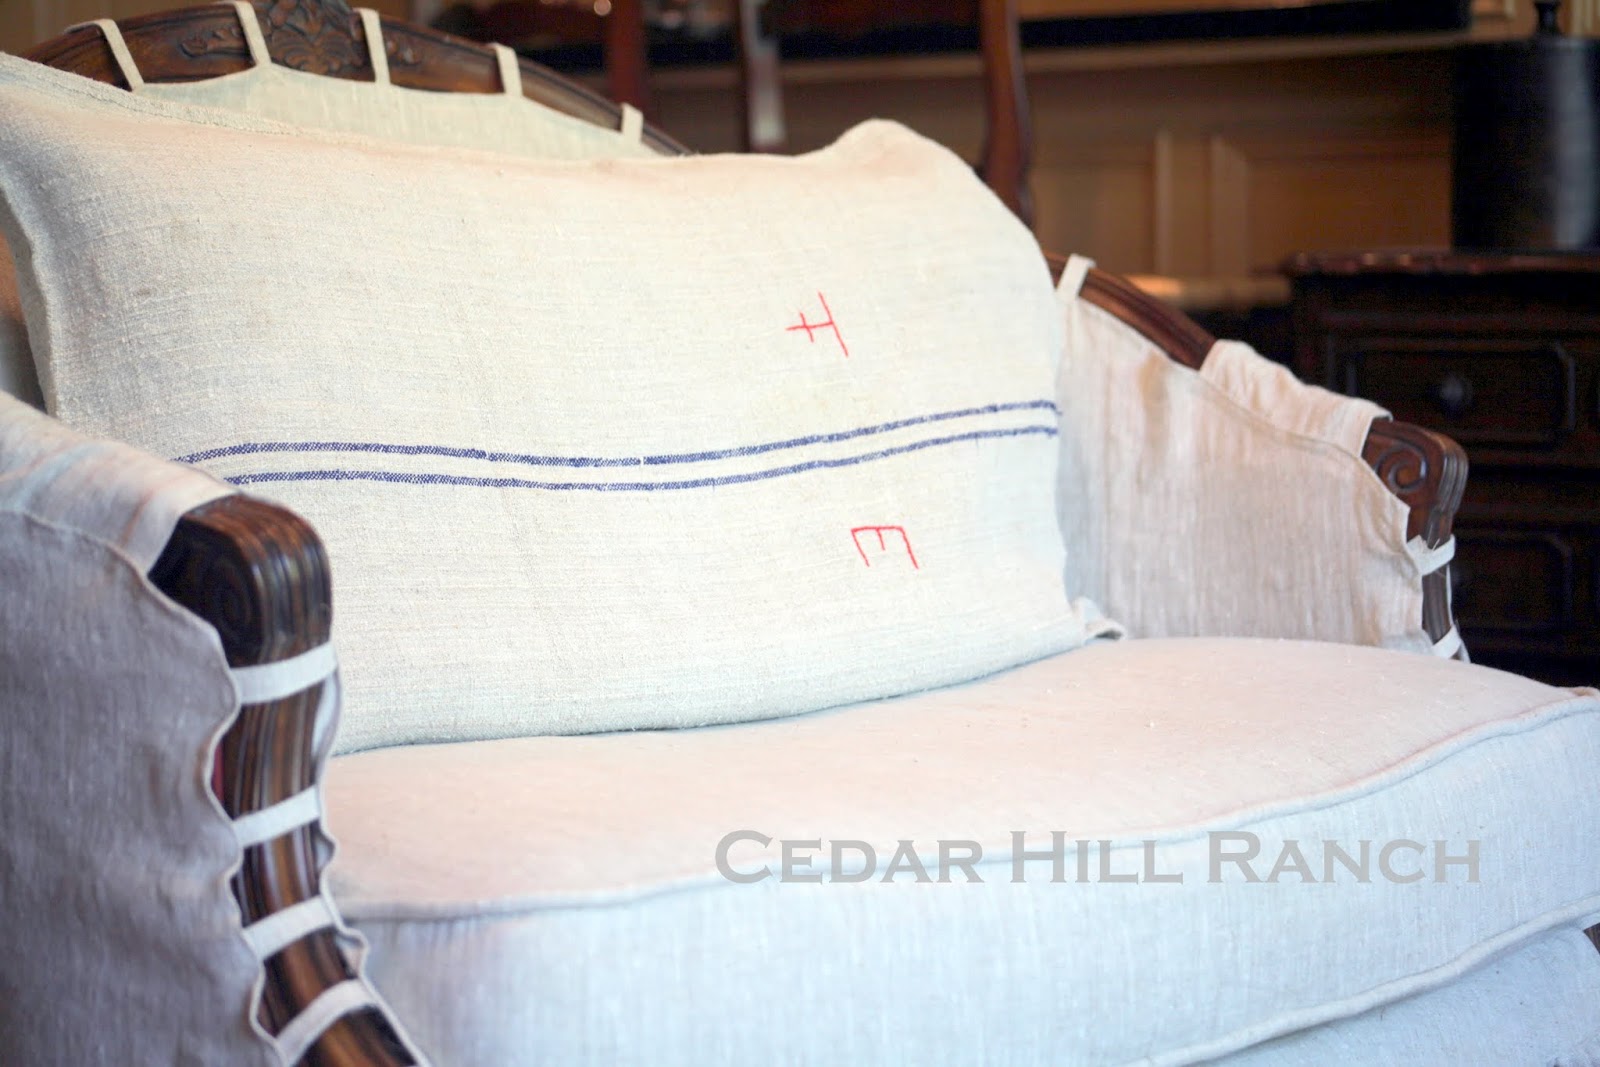
10. Make sure the opening in the back for the cushions is big enough to insert your cushions. To be sure it’s big enough use the same size opening as your current cushion covers.
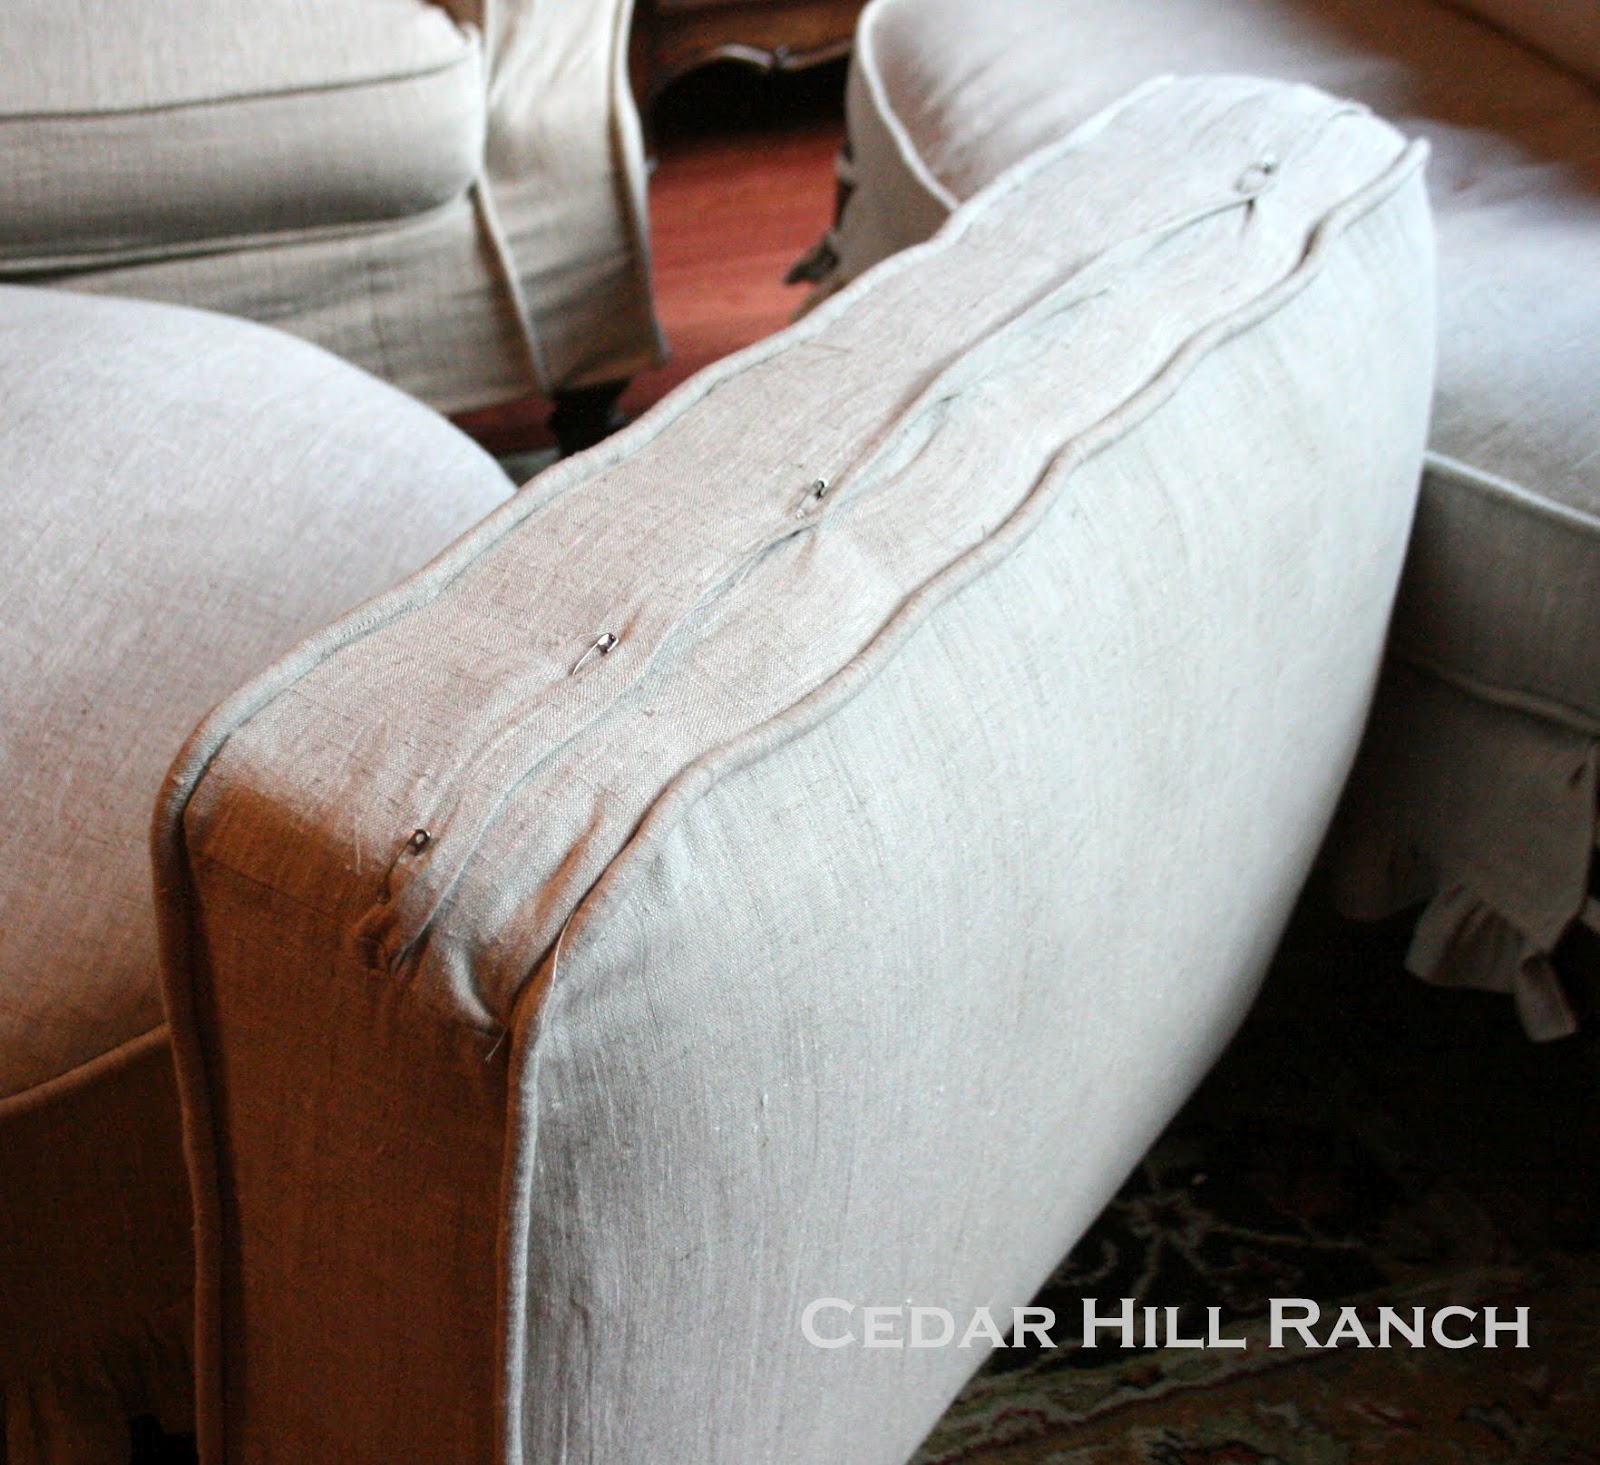
I use safety pins to close my slipcovers. Professionals, I know, don’t do that, but it’s fast and it works great.
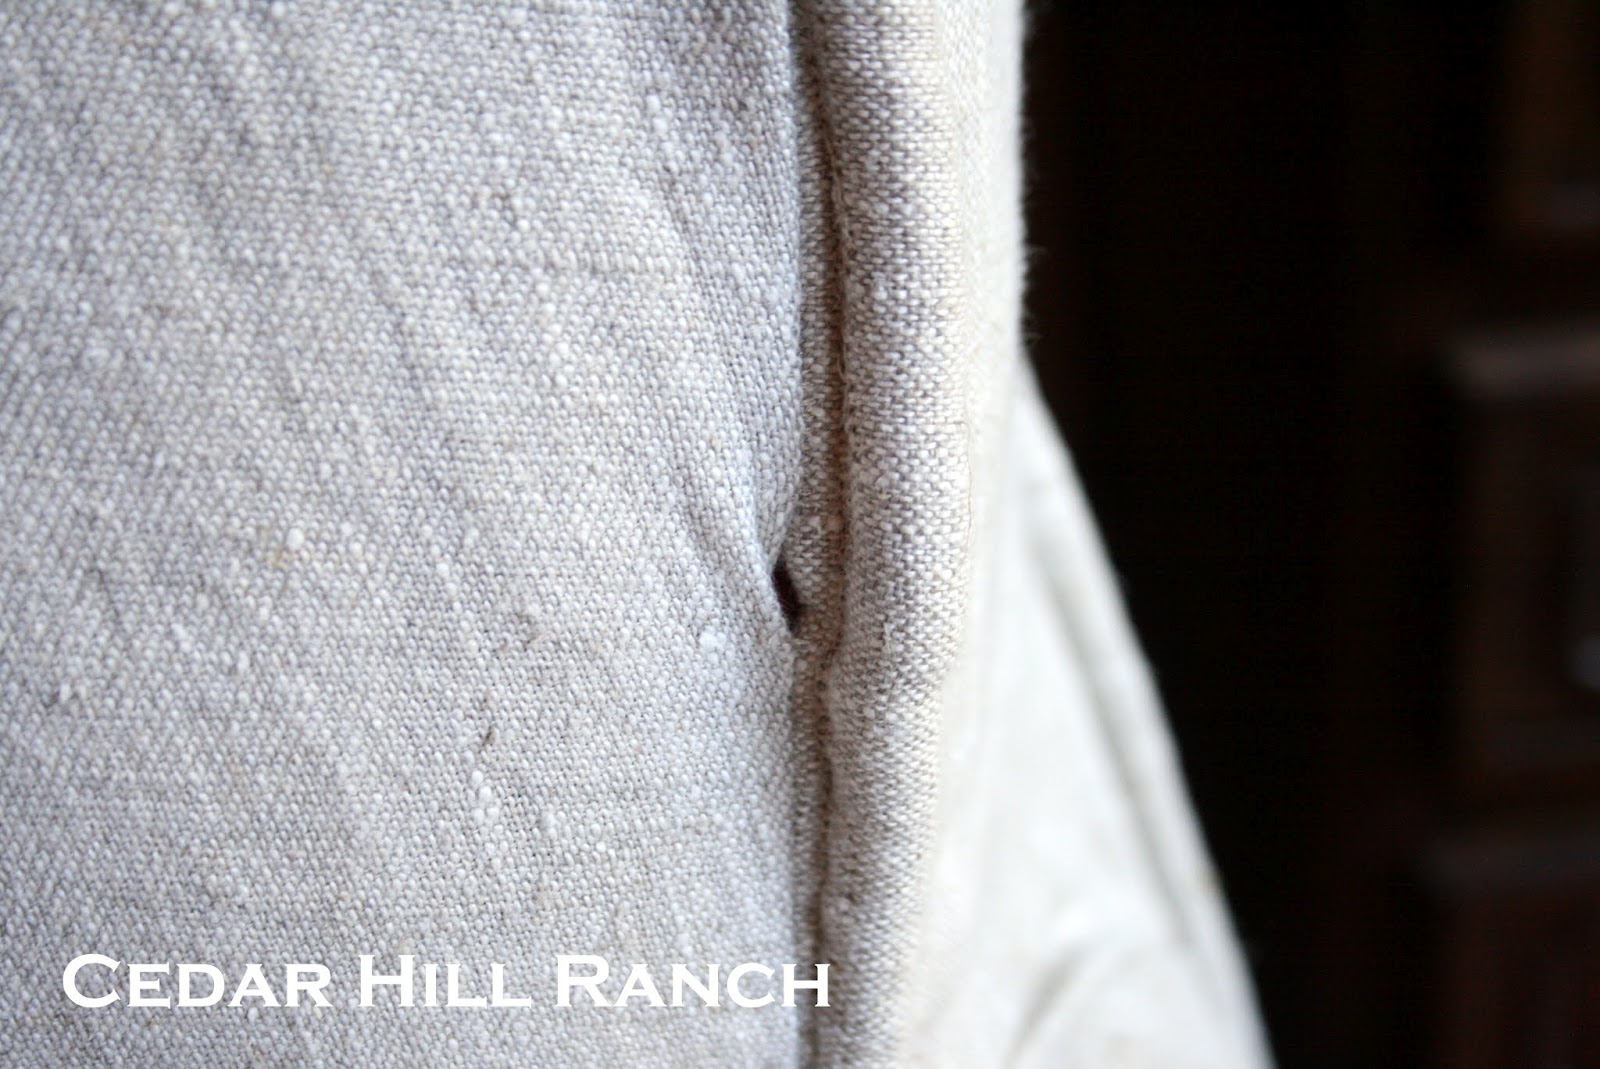
11. When in doubt, rip it out. Sometimes seams don’t end up in the right place or they are bunchy. There’s no need to panic, just rip it out and redo the seam. I had to rip out several places on this slipcover. It took a few minutes to rip it out, a few minutes to resew it, but the result was worth it! Here’s a messy seam that I redid. The fabric isn’t flat, the seam isn’t up next to the piping, and there’s a gaping hole.
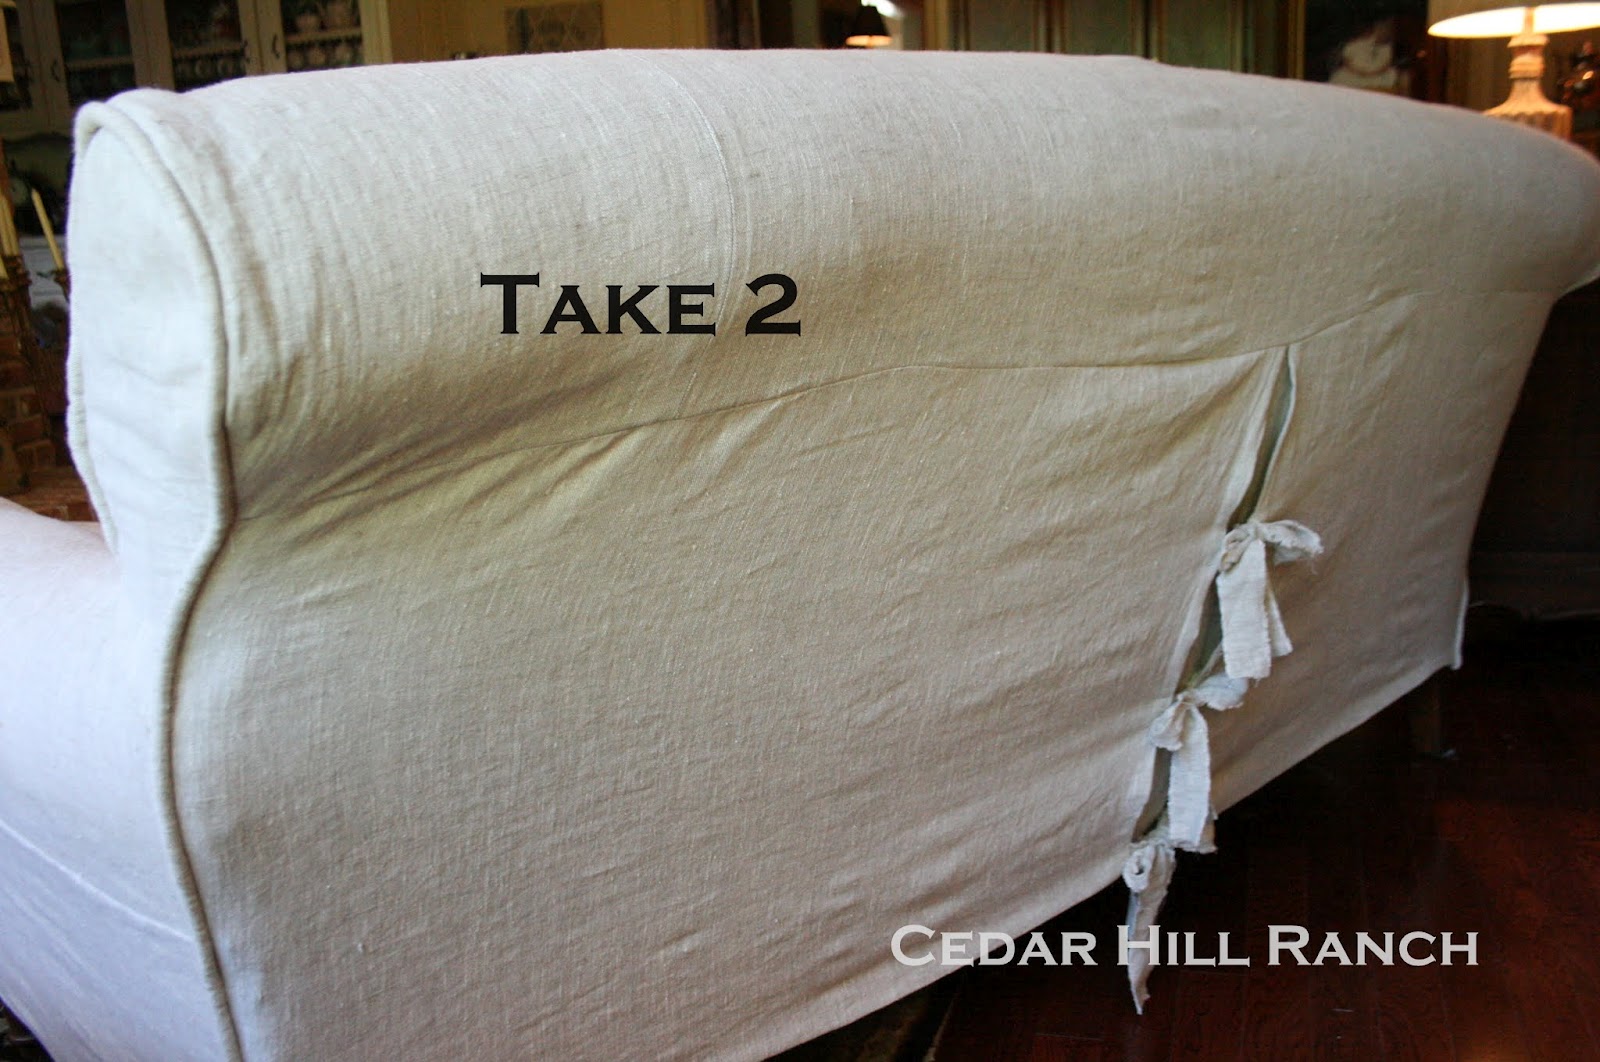
Here’s another example I wanted to show you.
Take 1 – bunchy, so I ripped out a small section, and re-sewed.

Hmm, still bunchy, so I sewed some more.
Still bunchy so I tried to smooth it out a bit more. It’s more smooth now, but the seam is very wavy.
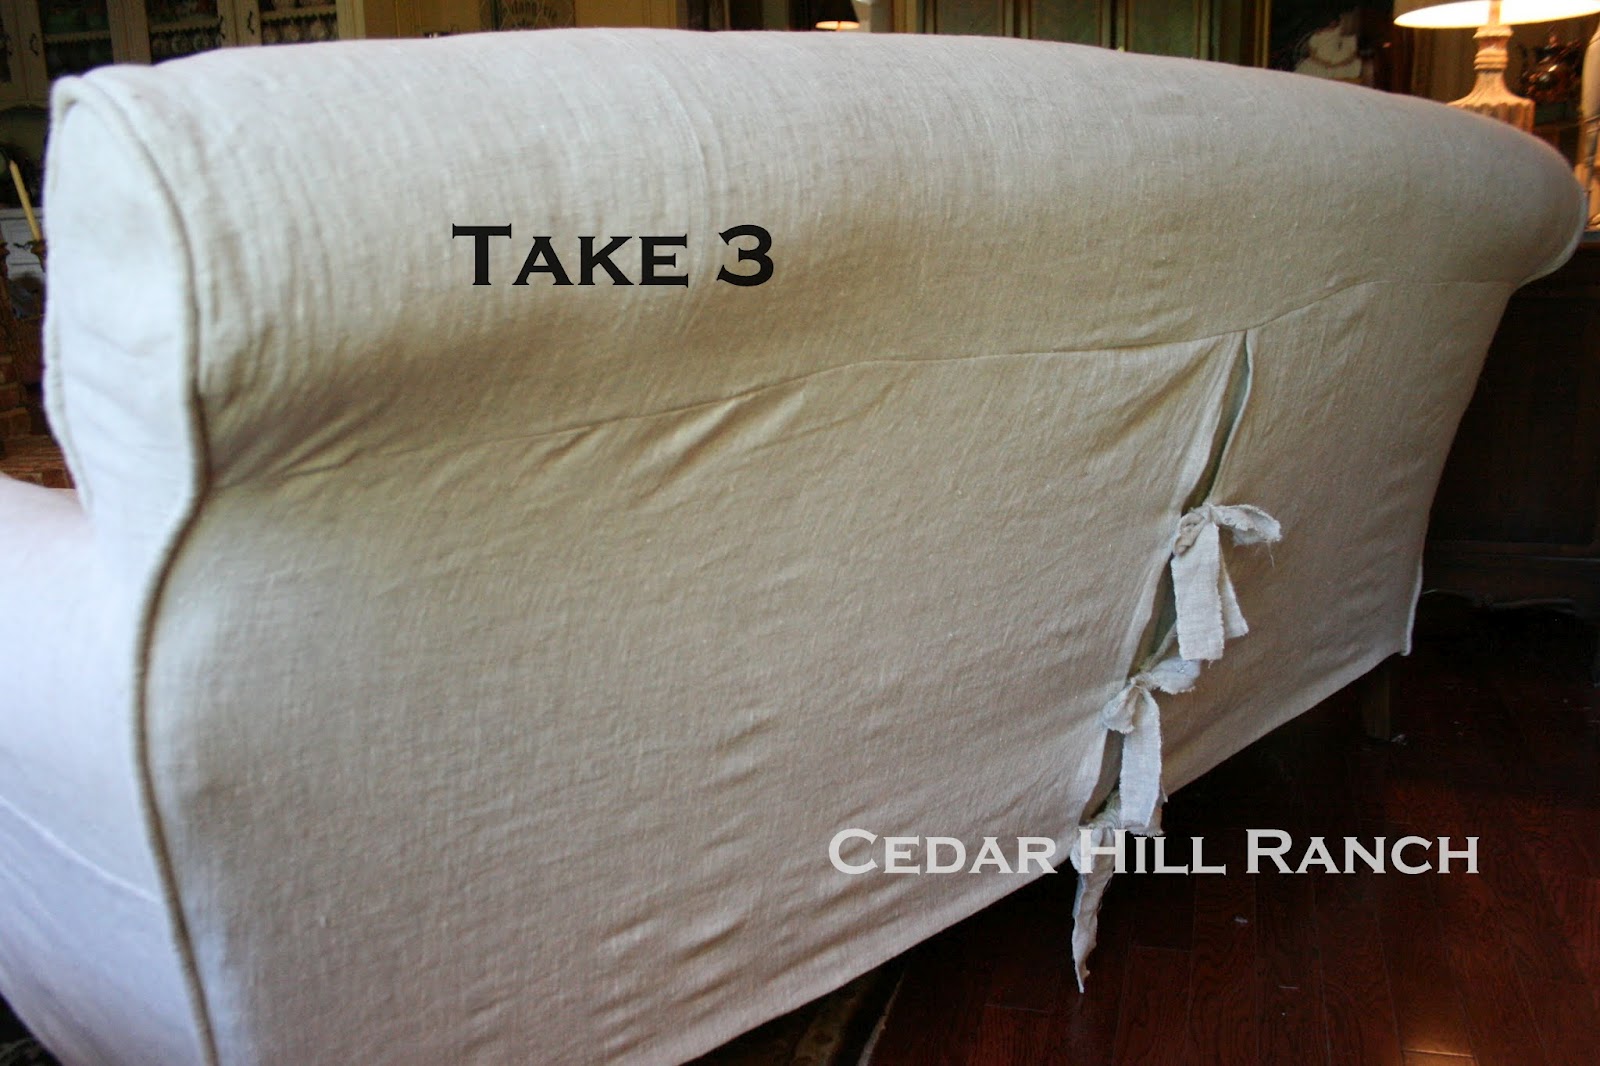
I ripped out some of the work I did above, and pressed the seam with an iron. It looks pretty good to me, and that’s good enough. I normally don’t bother worrying about bunching if it’s on a spot you can’t see, but this sofa will not always back to this wall, so I wanted to be sure the back was an nice as the front.

I have already reached a point of diminishing returns here, so I’m stopping. I think the trick is to be picky enough for the slipcover to look good, but not so picky, that you spend 10 hours fixing things that people won’t see or notice. If it were to bother me at this point (which it doesn’t, it’s a slipcover after all) I would have to go with Take 5.

12. Press your seams open as you go when possible. Where you have piping on a seam, you will not be able to do this.
13. Pull the fabric taunt as you pin on new sections for a snug fitting slipcover.
14. Take your time. You want your slipcover to look professional, so take some extra time to ensure that it is neat and tidy. If it is a spot under a cushion that no one will ever see, then don’t worry about it, otherwise, go slowly and take the time to do it right. You’ll be glad you did.

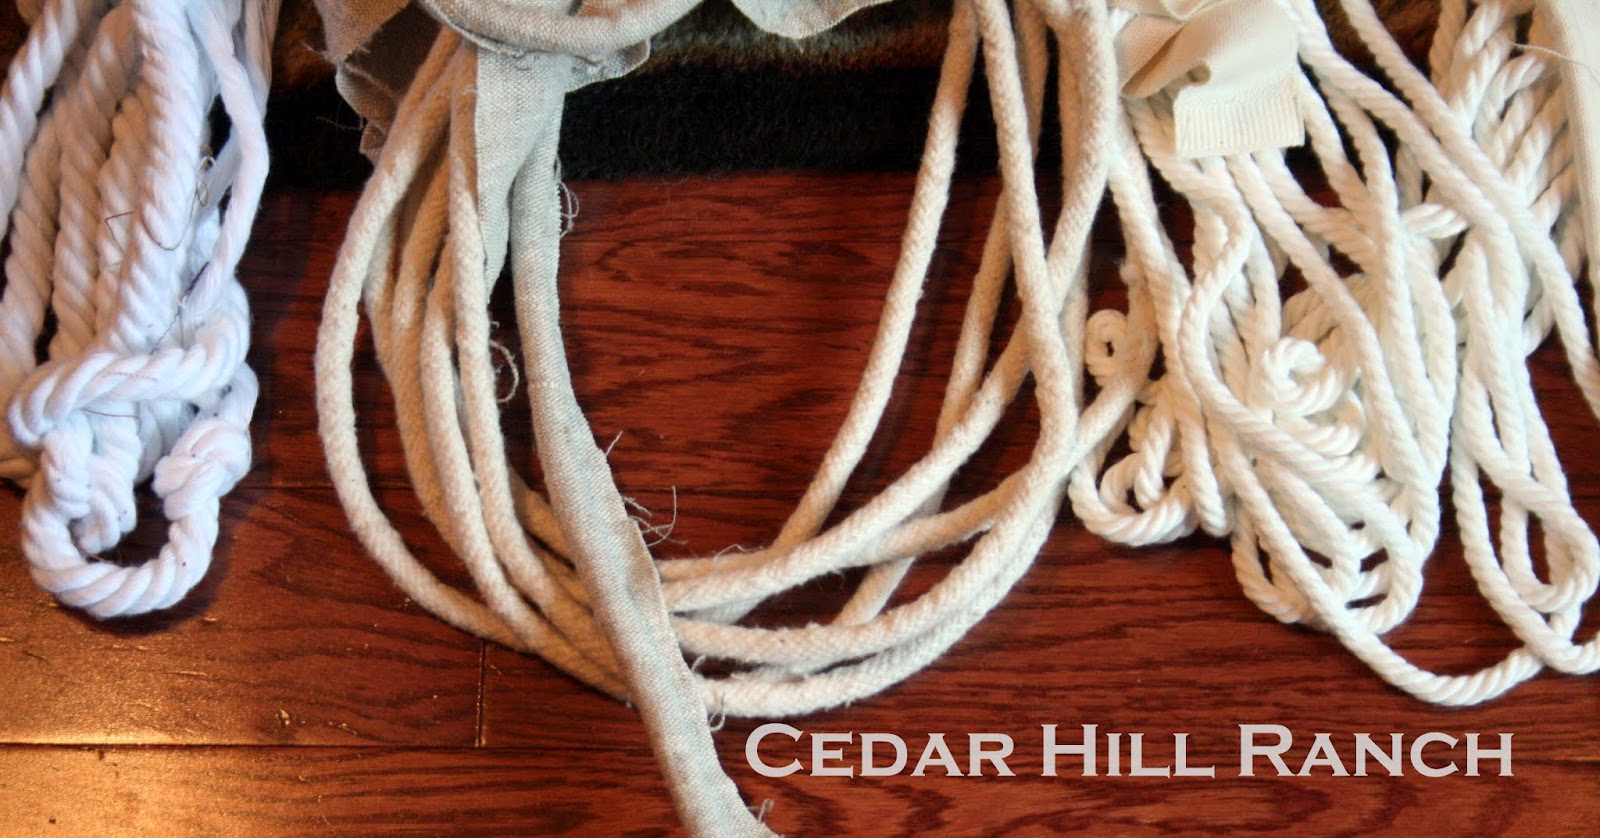
15. When making piping, use a larger size piping than you think you need, skinny piping looks cheap. I am not sure of the size I used, but I believe this is a 16/32″ piping for this slipcover, although for the slipcover in my bedroom, click here, I probably used the 3/8″ size.
Here are some of the piping I have on hand to show you the different sizes available.
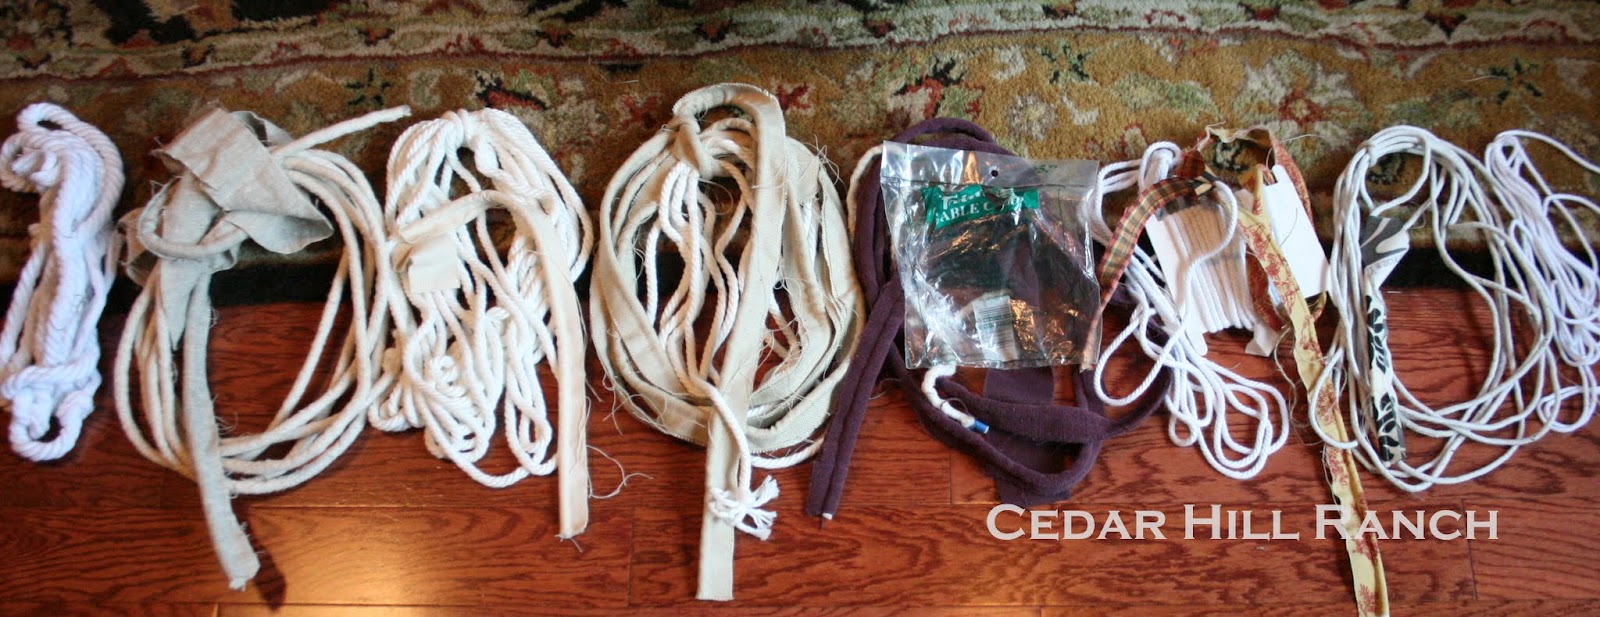
For this project I used the piping second from the left.
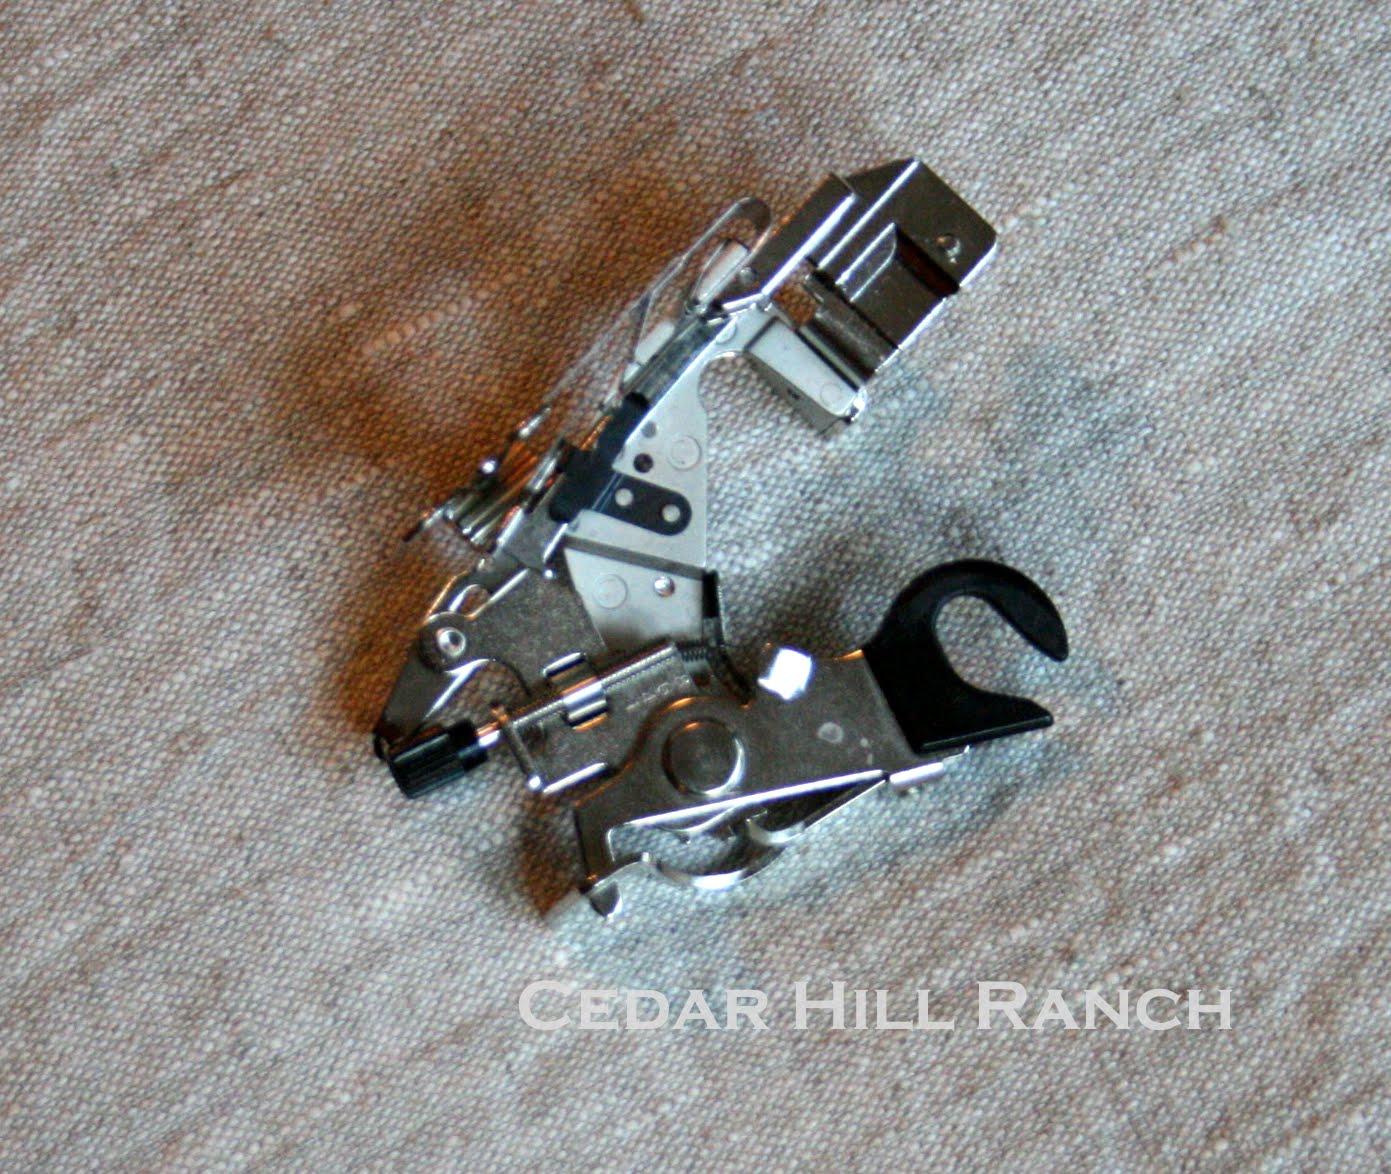
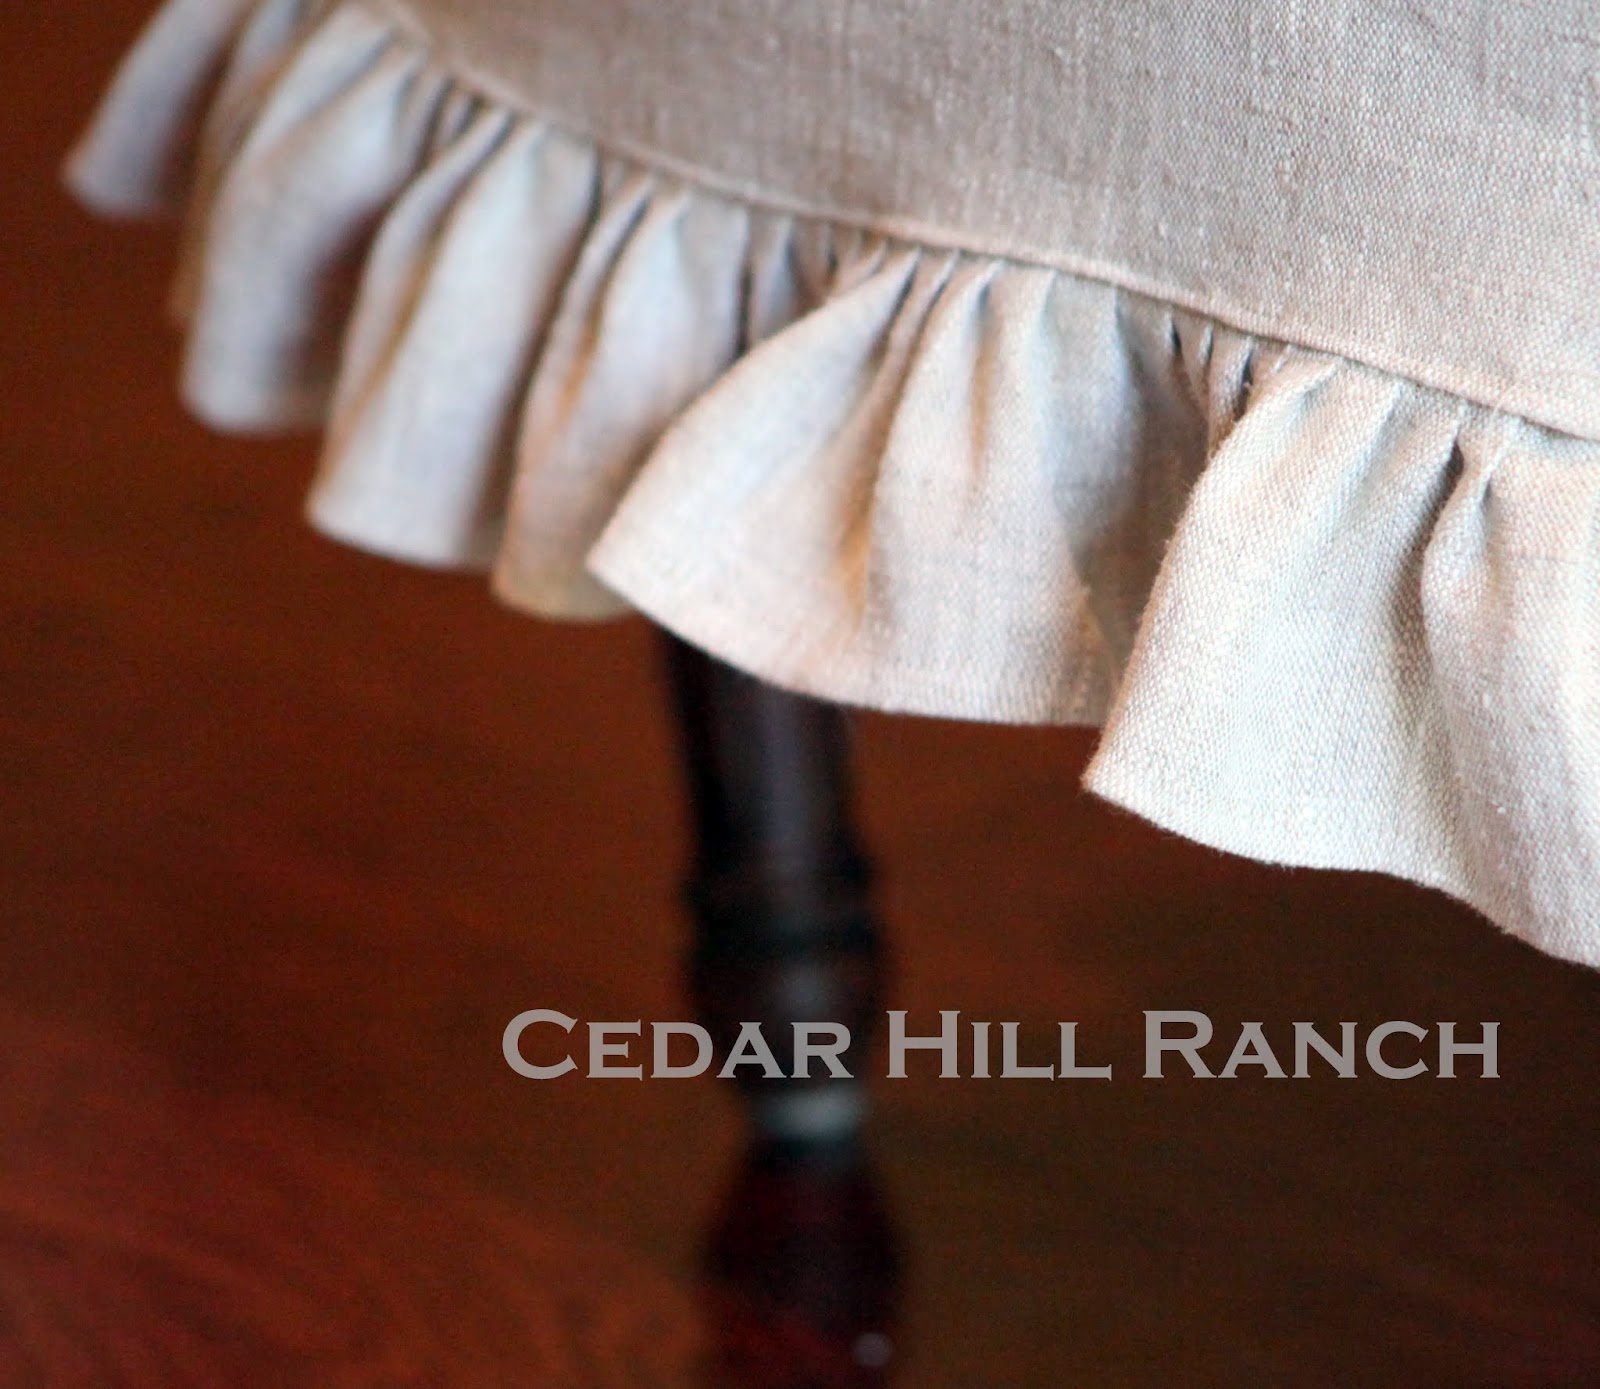
16. If you want a ruffle, use a ruffler to save time, stress, and aggravation. I’ll talk about how to use one later. They can be tricky and it is very easy to break a bunch of needles if you don’t know what you are doing.
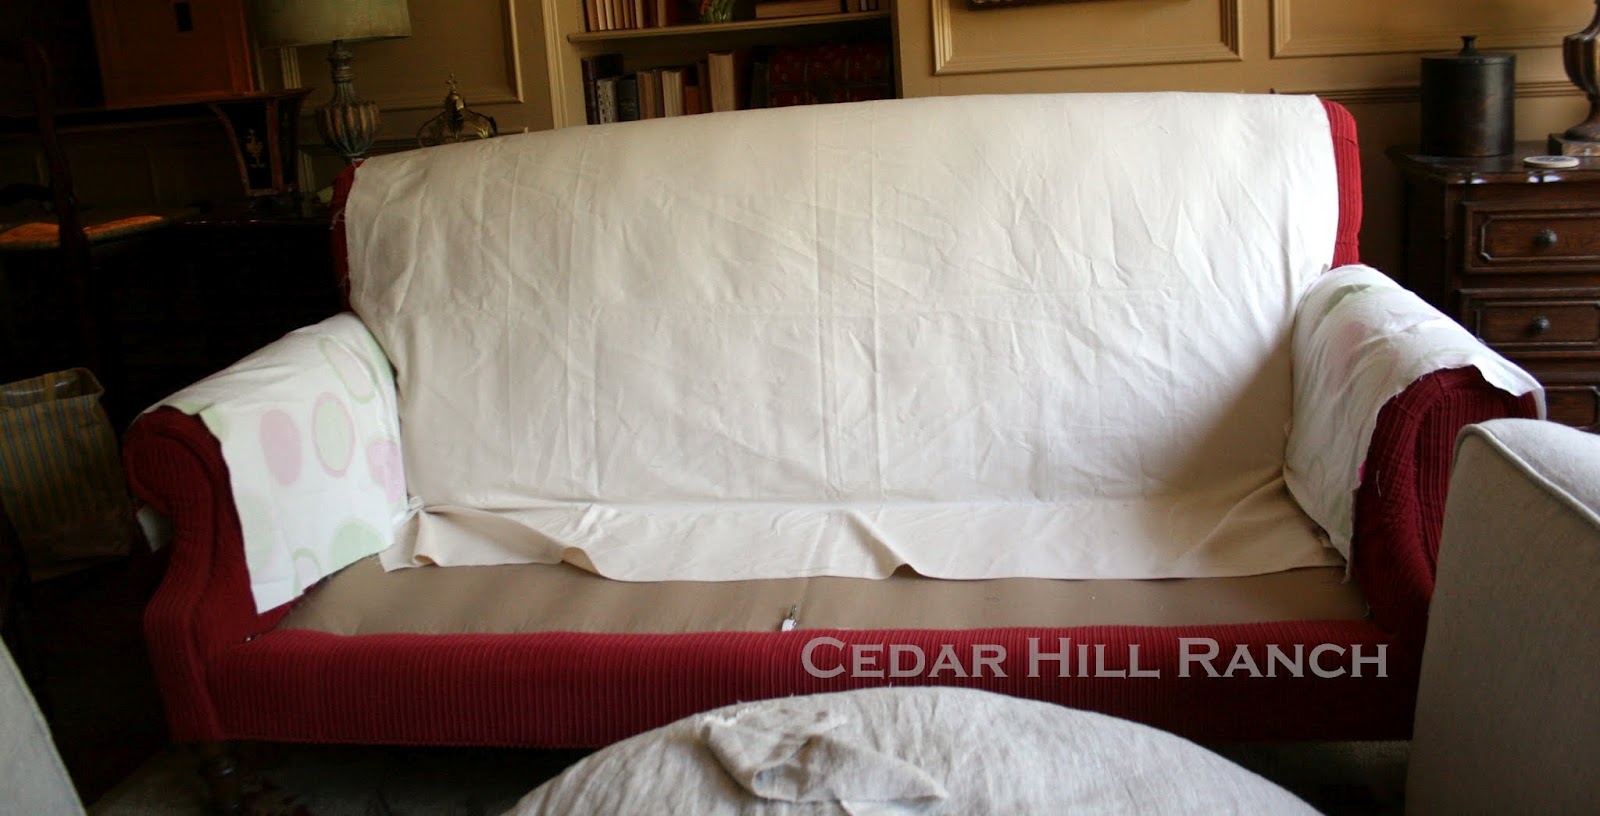
I used a large piece of fabric on the back to soften the indentations from the tufts. Since this fabric was corduroy and had ridges, I also used two layers of fabric on the arms to soften the ridges there.
The ottoman was also tufted, so I used 3 layers of quilt batting under the slipcover to soften it.

Here it is in process without the layer of batting.
To see some of my slipcovers, you can click on these links
Bedroom settee slipcover
Living room slipcovers


This is great info. Thanks!
thanks so much for posting your tips! i will be referring back to this post as soon as i muster the courage to slipcover my wingback chairs.
keya
This is a wonderful post to refer to for slipcovers! You did an incredible job! Your pieces look wonderful, Anita! I’m in awe because I don’t sew! You are such an inspiration!
great job, you have way more patience than me! I have a lounge that needs to be covered but I am yet to be bothered enough to do it!
Anita, you do a beautiful neat job and make it look easy.
Anita, I just saw your feature at Common Ground. What a beautiful porch you have! Love your collie, your slips, etc. Beautiful photography.
Anita,
You are amazingly talented!!!!! I wish I had a sewing machine so I could try this! Great tutorial!
xx
Anne
Anita, you amaze me. I don’t think I could tackle a project such as this. You make it seem easy, but I know it take a lot of talent to make slipcovers. Thanks for sharing the tips. I appreciate knowing what goes into a project such as this….Sarah
Anita your slipcovers are beautiful. Your home is amazing. Very pretty.
Kris
Great tips. Thank you for posting them.
Beautiful slopcovers, Anita! So much hard work with a fabulous result! Gorgeous! Happy weekend!…hugs…Debbie
Excellent post, Anita, and just what I needed as I have to replace some cushion covers. Adding a star to this post!
Anita,
Thanks for all the tips and trouble shooting with your tutorial! You did a marvelous job!!! I read your post all the way through…and I only intend to make a table covering in the future! I’ll let you know how it turns out!!!
Fondly,
Pat
Thanks Anita for the great info. Your new living room slipcover redo is absolutely gorgeous!
Hugs,
Jann
I just can’t get over how fabulous your slipcovers are!!!!
Congratulations on your feature at Common Ground!!!
I found you over at Debra’s Common Ground & LOVE your slip covers!!!! I too have been loving & living with red for my colors. But, like you… I am tired of it & want the clean look you have chosen. I have NOT sewed in years & am fearful to step out & try this. Which do you think I should start with… trying to do a coverlet for the bed or jump into the slipcovers? Also, where do you suggest finding the fabric like your sofa? I live in the DFW area & I assume from your Blog name you live close too. If you’d like to send me an email answering all these pesty questions please feel free (as it would be more private for both of us). I have an email link on my blog. And… I added you to my sidebar so I can keep up with new posts better. THANKS for sharing. So glad to have found you.
Charlene
Anita, I am hanging on every single word you say! I have never attempted slipcovers and I’m going to make a couple this fall! Thank you sooooooo much for these tips!!!! Keep them coming!
Please join me for TUTORIALS TIPS AND TIDBITS. Everyone who love slipcovers can benefit from your slipcover wisdom!!!
What a beautiful inspiring blog You have. Thank You!
/Maria Northcutt
Anita,
Stopping by to let you know that I will feature your slips at my party tomorrow.
Blessings,
Linda
I am a sewer and have been most of my life….and slip covers just throw me. This is hands down, the best tutorial I have ever seen.
I recently moved to France and finding a sofa has been much harder than I expected….so I am about to tackle slip covering ours. THANK YOU, thank you, thank you for this!!!
Simone
This post is exactly what I needed to get up the courage and try slipcovers. I don’t know why it feels so intimidating to me. Thanks Anita
Leslie (aka Gwen Moss blog)
AWESOME tips!! I am going to need this soon!! (Fingers crossed)
Thanks Anita!!
Have a wonderful day!
Meegan
meeganmakes{dot}com
Hi Anita! Thanks so much for posting these great tips! I am pinning them under Furniture Inspiration. All of your slipcovers look really great and have inspired me to make some of my own. Have a great week!
Debbie
AMAZING! Your furniture looks wonderful. This has always seemed so hard to me, but I’m about to try it with an old chair. Your tips have helped me. Thanks!
You did a fabulous job, Anita! Great post about slipcovers, although, I probably wouldn’t tackle something like this myself. You must have the patience of a saint!
Stop right now! You made your slipcovers?!?! I am UBER impressed! I wish I could just figure out how to sew a straight line! I love how God divies up the talent among His girls! xoxo!
Great post! Love the tips…Pinned the tips, and now will start following you! So happy I stumbled on to your blog!
Thanks for the tips! Pinned 🙂
The tips provided on the blog are very interesting and informative, I will try to get those tips which i am finding useful to save my furniture.
WOW…Great furniture here. And thanks for your valuable tips.
Love all the work you have done. The tutorial is so clear and great that many are wanting to do this with your sharing all.
Most of mine has beem upholstering. After a very long time I found the piping to be the most difficult, especially hard on my machine. Not to edge in on your beautiful job, but wanted to add a couple of tips to those new to slipcovers.
Use a walking foot which helps pull thick fabric along as you sew. They can be bought at any sewing store and eliminate breaking a bunch of needles, plus give a smoother run of stitches. I also use leather needles.
For piping I roll over edges of the straight fabric pattern (arms?)and sew the piping within rather than a separate piping sewn. Then use the stitches as a guide for sewing the odd shapes to it. Even the cushions.
Am not a professional, just addicted to covering furniture. Once you start there is never an end to creativity…which also leaves one with piles of fabric from hanging around sales at fabric stores.
lovely job..now I know what I must do!!!!!
You do a fantastic job making slip covers! I just finished making simple slips for my dining chairs and now am about to tackle a living room chair. Thanks for such great tips! Here’s to conquering the chair! 🙂
This is exactly what I want! I just don’t know if I can do it 🙁
What type of material did you use? Where did you buy it from and what cost? What do you think a couch makeover costs? Yours turned out perfect!
This is a resourceful and wonderful post! I have a few more smaller furniture items that I would to have slipcovers for and have read books for help, but your tutorial is VERY informative and makes sense.
This is the best tutorial that I have seen on slipcovering & rivals some books! You are amazing & an inspiration!!
Thanks so much!
Great tutorial. I appreciate the details. Also love the creative way you covered the wood frame chair. Will be using your instructions soon for a sofa and loveseat.
Anita,
I was looking at the blog “Savy Southern Style” & saw Kim had a link to your blog about linen she used to cover her chairs. She said you had told her where she could order it. Could you please let me know where and specifics of the fabric? I am going to tackle covering my sofa & loveseat and would love to know where you get good quality & especially good price on your fabric. Thanks so much!
Tonie
Thank you so much for these tips! I plan on starting a slipcover project soon and this will be coming in handy. I plan on posting on my blog in June. http://www.dcartworkhome.wordpress.com
This is great, and very helpful for someone who has a lot of sewing experience but little courage! I love that you shared your puckers, etc., and how to handle them. I also thought step 5 was exactly what we need to remember to do when all else fails! Thanks for the explicit instructions.
This is my first time on your blog – and I am not going anywhere!! I have been wanting to slipcover my old, but beloved sofa for a year! NOW I know HOW TO DO IT!! Even though I have NOT sewn anything but an apron while in middle school 🙂 I will report on my result as soon as I get it done! Thank you for this great tutorial!
How I wish I had found your site 2 years ago when I bought a wing chair at an auction & thought I could cover it. I have skirted around it and now I have the solution. I have looked at overs sites in the past 2 years and basically could not understand the steps. I live in Australia so I enjoy looking at the sites in your country. Thanks from me and look forward to your updates on your site.
So do you have a tutorial on the round ottoman. How much time. Is the piping hard? I know it will make it look more finished. I just can’t seem to envision it- you pin it to the round top piece right sides together?
Thanks for your help!
Rachel
I don’t Rachel. Making piping is so easy!! Yes right sides together. I plan to do a video tutorial, but it will be early 2015 when I get to that.
I’ve got a chair that I want to tackle Anita … I think I can … I think I can …
Could you share your source for fabric? I just love the look you achieved with the linen slip covers and the antique grain sacks. Also — how has it held up? Have you had to launder the slip covers since making them? I’m slightly afraid of using linen since it wrinkles so much (in case I have to launder them on a regular basis), but love the look. (I have small children, so slipcovers that can be easily cleaned is my goal!)
Christina, the fabric on the sofa came from nyfashioncenterfabrics.com or something like that. No haven’t had to launder them yet, but we aren’t on the sofa very often. Yes linen wrinkles a lot, but that is part of its charm and doesn’t bother me in the slightest. If you don’t like wrinkles, don’t use linen!!
I am SO inspired! You are just wonderful, Anita, and I am so happy I found you! Thank you so much for all your clear, step by step directions! Now …. I just need to find someone to make all that piping for me. I have never done that and am intimidated by the process! 🙂
Debbie that is so easy to do!!
Thanks for the excellent tutorial. I have the chairs and the fabric, but have not had the courage to make the slips, probably because I’m not com fortable with the piping. Do you wash the cord before using it, or does it not shrink?
It does not shrink.
Thank you for the details and step-by-step photos. I feel like I could tackle any chair/sofa, no matter how it is shaped.
Seems I’m late to the party. I’ve sewn many things but never sewn slipcovers but NEED to do some this fall. My great fear is sewing the cushions on my camel back sofa. Now I feel more ready to tackle them. I am assuming you used pre-washed linen which I can get from my supplier, I am going to try the painting technique you showed awhile back. You are a GREAT inspiration to all of us. Thanks sooo much. Dixie
LOVE your slipcovers and your blog! I’m about to slipcover my round tufted ottoman, and am wondering if you sewed the batting to the slipcover, or do you just place it on the ottoman before putting the cover on?
Thank you for helping us ‘real people’ with design! 🙂
The batting is just sitting there under the slipcover Nancy.
Thank you for posting such great information about making slip covers. I’ve been planning to make one for a while, and some of these things I never would have thought of. I do understand about ripping it out–sometimes I feel like I use my seam ripper on some projects more than my sewing machine (and I’m not sure how that’s possible). Pinning this because I know I’m going to need to refer back to your tips several times. Thanks!
Thank you Rebecca.
You do a wonderful job!!
In step three it says not to use a center seam, why not? I’d like to have as little sewing as possible, and possibly no sewing and just a lot of tucking for the body of my loveseat. The cushions are enough sewing for me! haha Thanks in advance I’m looking forward to your response. 🙂 Wendy
Because when sewing you never want a center seam for cosmetic reasons. Your eye goes tot the center, and you don’t want a seam there.
Okay… inquiring minds want to know… Why do the pics have a watermark that says “Cedar Hill Ranch”? 🙂
Julie, when I started my blog it was Cedar Hill Ranch, then in 2013 I changed it to Cedar Hill Farmhouse. I thought that was a better description, and no one things Country French when they hear the word ‘ranch’.
Ahhhh, I thought it might be something like that. 🙂 Smart thinking!
Yesterday’s podcast was a hoot! Y’all are so funny, and your laugh just makes me giggle! I think you won the GRAND tip of the day… just sayin’. 😉
Have a great day!
Anita, I am preparing to make a slipcover and your tips are GREAT! I hope you are still monitoring this blog as I have a question. I want to add a luxurious feeling to my cover. I have a down comforter that I no longer use and want to incorporate it in some way. (I have experience making apparel, backpacks, down sleeping bags and one upholstery project) My first thought was to sew it into the cover but I nixed that idea due to the weight of down when wet. I’m afraid it would tear the seam. I see you just placed batting and covered over it. Does it shift? That’s what I am thinking would happen to a down piece, cut to fit. Any thoughts? Thank you, Kathi
Kathi, I am trying to picture what you are saying. I think it might shift. I hope that is helpful.
I’m sorry I should have said; I want to add the down piece to the seat cushion. It’s a camelback sofa so the arms are quite full as is the back and don’t need it. Since the only other option I have other than sewing into the seams (too heavy when washing) is just to place a cut to size and sewn closed piece of comforter over the existing cushion, and making the cover to fit over the cushion and down piece. I can’t think of a way to secure it from shifting tho……I guess I will have to do adjusting of it when needed. Thanks for your reply!
Anita,
The cording on my couch cushions slips down the front of my cushions how can keep this from happening? Do I add more batting to the seat cushion? I just don’t like the way it looks when it slips down the front. Thank you for your time.
I think they can be pinned into place and that might help. But a lot of slipcovers are often a bit ‘relaxed’ looking.
Could you tell me where you find your slipcover fabrics? I’ve been shopping and ordering many samples from different suppliers without finding what I really want.
Jeani, I have bought fabric from many places, so I don’t have just one place. Try New York Fashion Fabrics, or Instalinen. Be sure to get samples first, so there are no surprises.
Do you finish the raw edges in any way to prevent fraying? I’m working on my first slipcover and, since I don’t have a serger, thought I’d pink the edges. With the seat cushion finished, however, I am finding that a challenge what with the 1/2′ seam allowance and the bulk with the piping, etc. Especially at the corners where the box band meets the top and bottom. I am working with cotton duck and it is fraying badly as I am working. It doesn’t seem efficient to switch the presser foot from zipper/ piping to regular foot so I can zig-zag every edge. I also would prefer not to use the color-matched thread on this hidden area, and that would mean changing the thread and bobbin. Is there a better way?
Kathleen, duck fabric seems to fray easily. You could use the fabric glue on the seams if you are careful not to drip any excess glue. I’m talking about glue meant for seams. If you aren’t going to wash the fabric, the fraying may not be a big deal. I don’t have a lot of advice here. I have sewn a lot of slipcovers, but many of them have not needed washing. All the best to you, and I hope you find someone who is an expert on the topic! I’ve probably made less than 20 in my lifetime, so that doesn’t put me in the expert category.
That’s 20 more than I have! Thanks very much for your advice!
thank you for your kind help. it would be a great help to choose the right cover.thanks again dear
maybe, The actual name of the cloth cover for the arm of a sofa is antimacassar – a small cloth placed over the backs or arms of chairs, or the head or cushions of a sofa, to prevent soiling of the permanent fabric underneath.
I want to know: What’s the actual name of the cloth cover for the arm of a sofa?
thank you
just amazing. I cannot describe this post in a single word. just wow information. thanks for sharing
I know this seems silly to ask but I’m doing it anyway. I feel like I’m not pinning properly. Lots of sites mention pin and sew. How to pin properly and then take them out as you sew tutorial would prob change my life. A dear friend sent me a sewing machine and a serger a while back. I want to make her proud and I’ve always wanted to make slipcovers. Hopefully for money at some point. I’ve heard people have paid off their house doing it.
Thank you for all your time doing tutorials and sharing your beautiful work!
I take the pins out before they go under the sewing needle. That’s a great idea to do a tutorial!! Not sure when I get around to that, but I bet there’s already one somewhere on youtube.