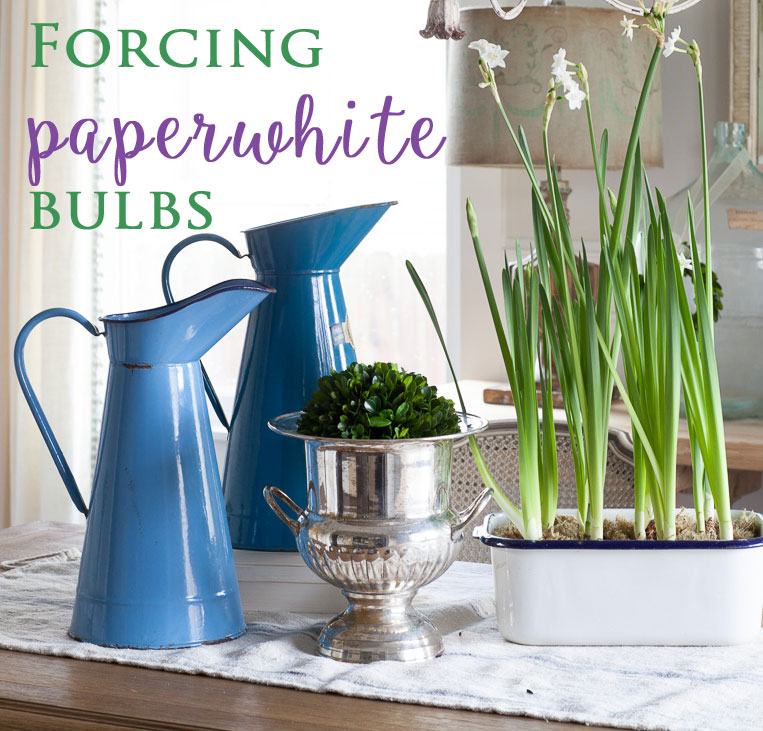
I thought it would be fun to grow some paperwhites from bulbs this year. And I thought it would be even more fun to show you how I did it.
This way I can tell you how easy or hard the process was. You know, learn from my mistakes, so it’s more fun for you.
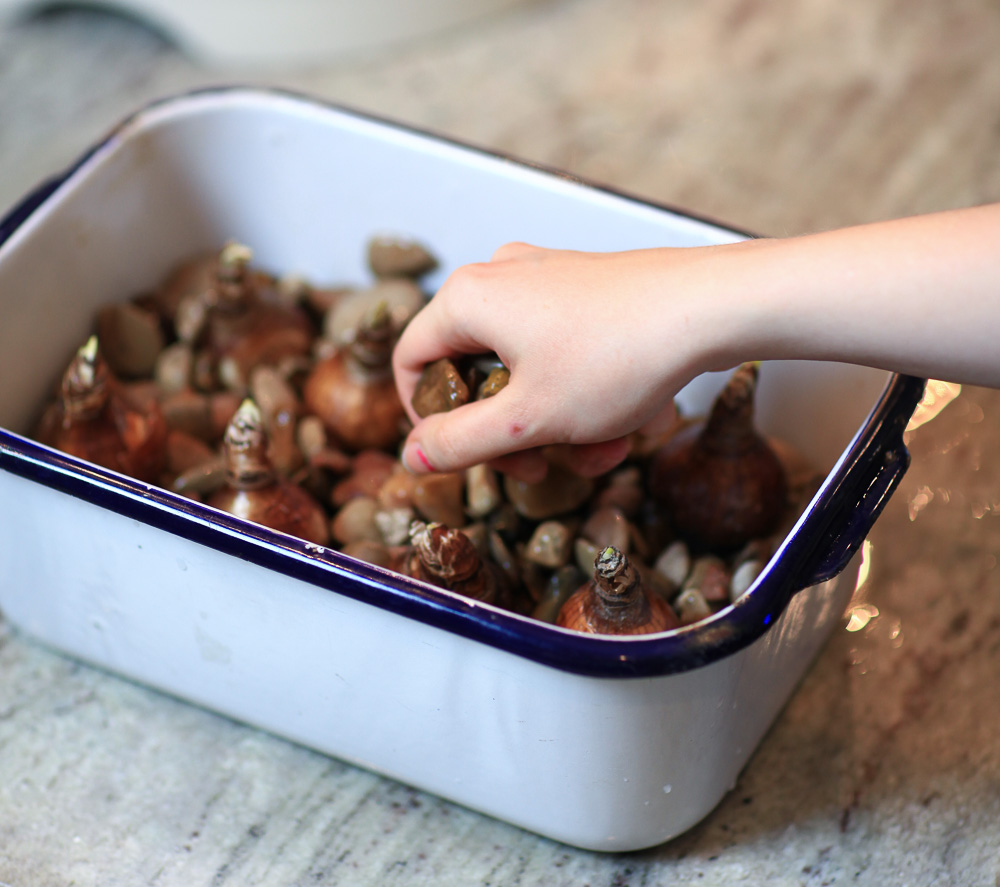
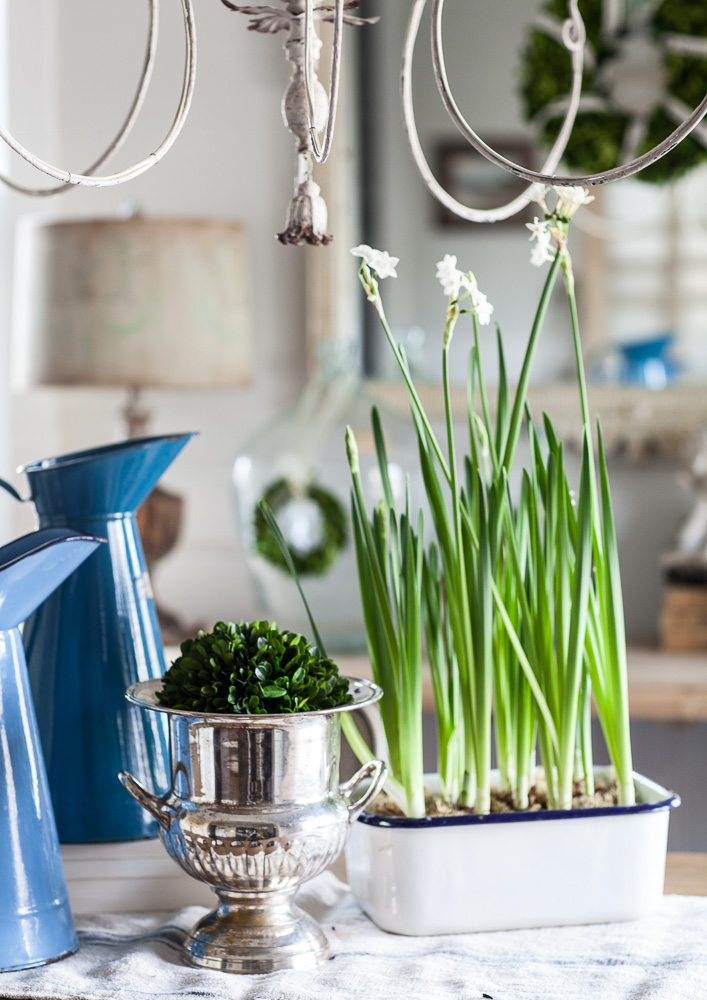
I did a bit of research, and it looked super easy. Buy bulbs and put them in a container. At first I had them in a cute oatmeal tin can, but it leaked, so I went with this enamel basin.
First we added rocks, and then placed the bulbs on top of the rocks. Then we gently places more rocks around the bulbs to help anchor them in place.
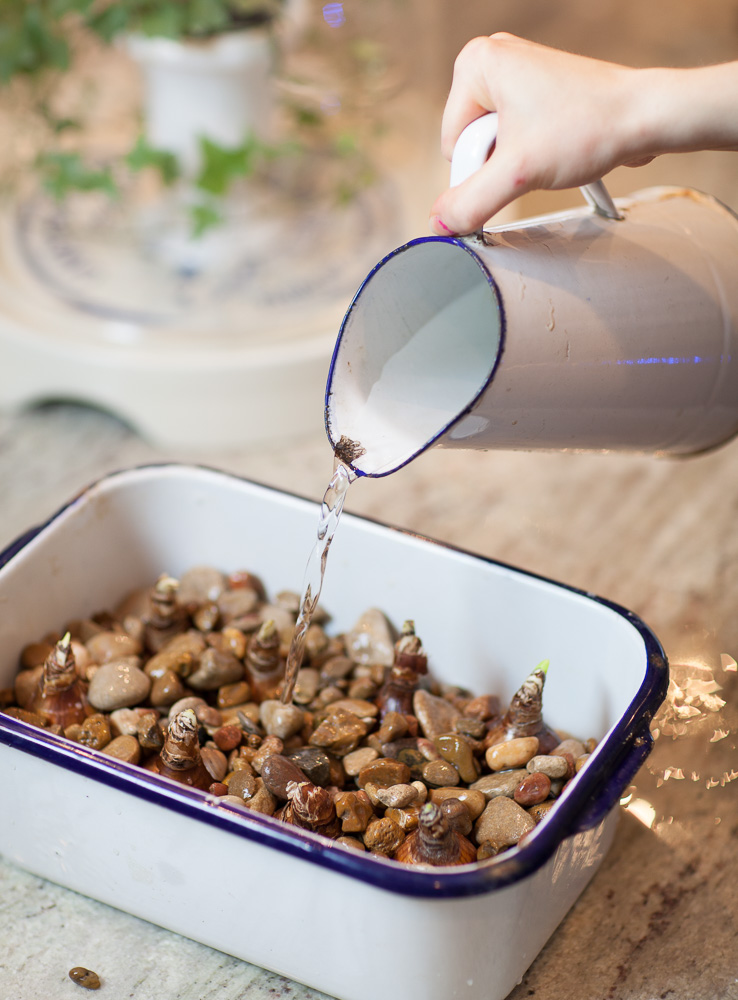
After we had the bulbs in place with the rocks, we added water half way up the bulbs.
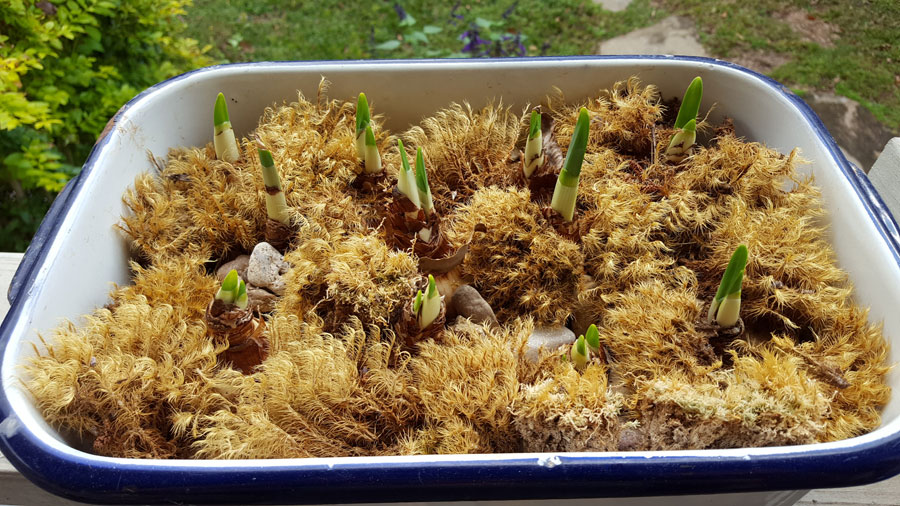
Next I set them outside to get the maximum amount of light. One night it got below freezing, so I brought my bulbs back inside.
I also added the moss on top of the rocks. As you can see the paperwhites were eager to face the sun.
A few weeks went by, I went away on a few trips, and when I came back, I found that I had blooms!
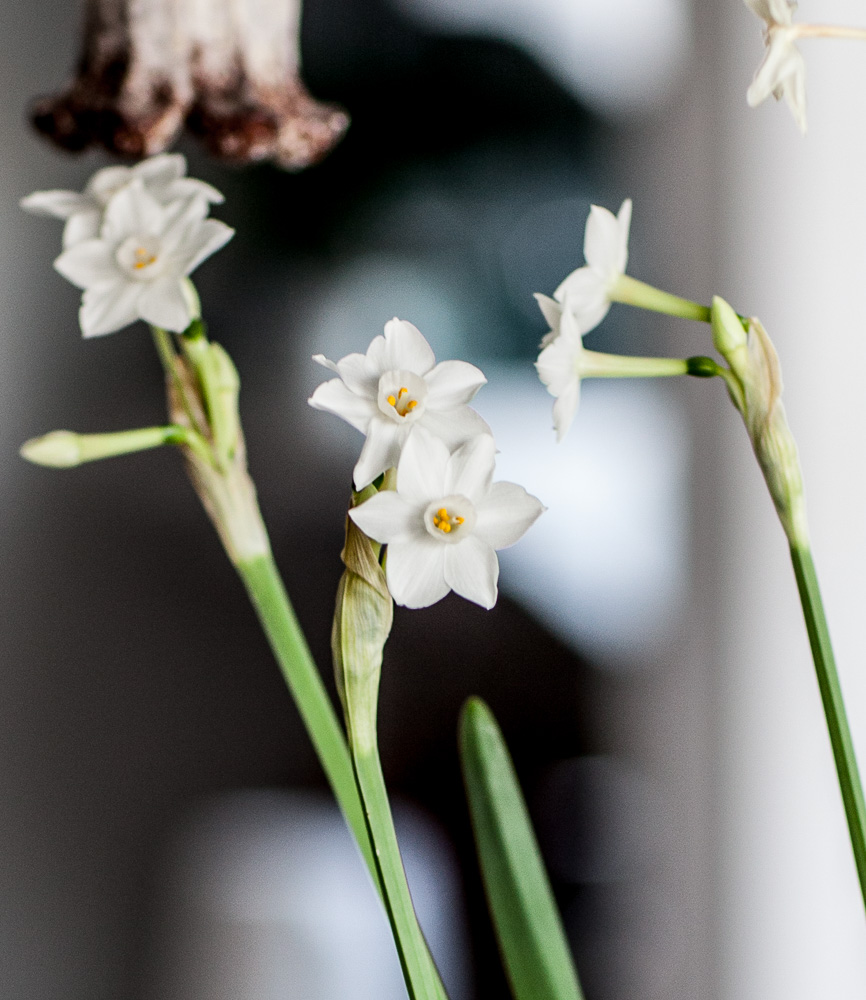
And there are more on the way! I give this project an A+ for ease of completion, and satisfaction with the results.
It was that easy! And it’s not too late to plant them either. affiliate link
This is the place where I ordered mine. All of the ones I planed came up beautifully. I’m going to plant the rest of the bulbs today, so I’ll have more blooms after these are spent.
Be sure to leave a comment! It will automatically enter you to win. Details here.

Check out what my very talented friends are doing as part of our DIY Tips and Tricks today.


I did this last year exactly as you posted & they were green until summer—never bloomed. I then took them up—cleaned them & put them in the refrigerator veggie crisper wrapped in paper towels to make them go dormant–now I plan to try again! I will let you know how it goes.
I planted mine in November 2016…
I had great success with this process….
love the smell…
they are still going strong
Great minds think alike! I ordered some bulbs last week and hope they show up so I can plant them this weekend. Love your paperwhites and I love these monthly posts. Thank you so much!
I’ve bought boxed paperwhites off and on for years at a local store, marked down after the holidays and love the sweet frangrance they give the room. I’ve rarely had an issue with them not blooming. The problem I do have is they grow so tall, they begin to fall over, in bloom and that really ruins the look of them. I’ve tyed ribbon or string around the bunch to help hold them up, just not as pretty though. Think I’ll give them another try and see if the rocks/stones on top to help with that. A great, helpful post Anita!
You make everything look so easy, Anita!! I tried to grow these one year, and they drooped. Not the result I was hoping for. This year, I have two amaryllis bulbs…so far, not much is happening, but I planted them both the week after Christmas. With our dreary Ohio days, the lack of sunlight could be a factor…despite the fact that I have them right next to my french door facing east. Hopefully, I will get some blooms this year. I love your beautiful vignette, as always!
I’ve been dying to dry this….thanks for the great tips!
Thanks for showing us how to do it…looks so easy.
I have done this with good success. My kitchen windows face south so they get good light as well as sun. Really easy. I love the idea of growing them myself and check their progress which makes me feel that I CAN grow something beautiful
I love doing this every year, however, my family doesn’t care for the smell ironically. I think they have a distinct fragrance and enjoy it. You’ve inspired me to head out to see if I can find some bulbs.
Your paperwhites look great! Please update us on their status. Mine ALWAYS fell over and I want to see what clever, cute way you keep yours upright.
Ginger
Oh I haven’t gotten to that phase yet Ginger. I guess I’ll have the ribbon handy!
Okay…Believe it on not, I read somewhere that adding a ‘bit’ of wine or other distilled alcoholic drink to the water makes the stems / leaves more rigid…no drooping !!! Can anyone comment on this? True? If so…What spirit exactly…and how much? Who thinks this sounds crazy at the least…and even poisonous to the plants???
PS: I too have not planted ‘bare’ bulbs in so many years I forget how I did it…and how it turned out. So….Just after Christmas I have planted around 10-12 clear glass containers. Small rocks in the bottom with ‘sprigs’ of faux greenery stuck around them so the container didn’t look so bare. Success!! All have turned out great so far, with numbers of paperwhites blooming away in my ‘blue light’ dining room…no sunshine. Kinda bright NE light behind white wooden indoor shutters. Waiting on tulips to bloom…I hope! But, YES, stems and leaves drooping badly.
Oh Linda, I will have to look into this.
Thanks for showing how easy it is.
What a breath of fresh air in the lull time of winter. I’m going to order some bulbs and give it a try. Thanks for this post!
They are easy AND they are fragrant too!! Further, they increase in bulbs so you’ll have more to share within a couple years. There’s nothing bad about this DIY project.
Thanks Anita!
Question – once they start to bloom and you bring them indoors, do you rotate them from inside to outside to encourage more blooms? or will they continue to bloom without sun exposure?
Dianne
O.k., I love them and maybe now I’ll have to courage to try them. I live in Texas too, though a little further north. Yours look beautiful! I didn’t know they had a sweet scent – a bonus!
Those are so pretty and look so easy! Going to give it a try.
I have a very brown thumb but I am willing to try it!! You make it look so easy!! Fingers crossed!
I only tried it once, but my Paperwhites never bloomed. I tend to use faux plants because I decided long ago I have no greenthumb!! LOL
So glad I came across your web site! I will begin remodeling the inside of my house this year and look forward to as much help with French Country decor as I can get! Love your style
I was visiting family in Portland last November right before Thanksgiving and brought back paper white bulbs. I have always wanted to try growing indoor bulbs. I was skeptical about having blooms in time for Christmas, but to my surprise, on Christmas eve I received my first bloom! I look forward to learning more “how to’s” from you!
I can even do this!!! Love the easy directions.
Thanks
Deb
I enjoy doing this also, but like others said, they always fall over. Sigh. Yours look beautiful.
Good morning! The paper whites are as easy as described. As some of you have mentioned though that they can fall over. I put mine in a tall glass container, like a vase, with rocks on the bottom, exactly as described. It worked well to hold them up and they looked perfect blooming in the vase standing up straight!
Beautiful and super simple… that’s right up my alley. Looks like I’ll be giving it a try.
Beautiful results! I think I’ll try it this year!!!
I’ve always wanted to grow paperwhites! I will now with your great tips in hand!!
Thanks for the instructions. So beautiful!
Those bloomed to be so pretty! I just clicked to see about buying some for myself. I really miss my flowers this time of year. #HomeMattersParty
I can’t wait to try this. So pretty. Thanks for sharing at Inspire Me Monday. I wanted to let you know that you are one of my Featured picks this week. Check it out at http://www.farmhouse40.com/inspire-me-monday-116
I’m missing my Hillsboro Farm. I think ill plant a few bulbs in our temporary apartment!
Have been wanting to do this for a while. Thanks for posting the “how too”!
I love this look! And I happen to have an enamel bin just like yours. I’m going to try this this weekend.
i love the look of the enamel pan with the paper whites. Who doesn’t like paper whites? this is so charming I have to try this this year.
Thank you for sharing on how to force paperwhites to bloom Oh my I have a lot of catching up to do with all the posts that I have missed since I have only found your site about a month or so ago Thank you and God bless