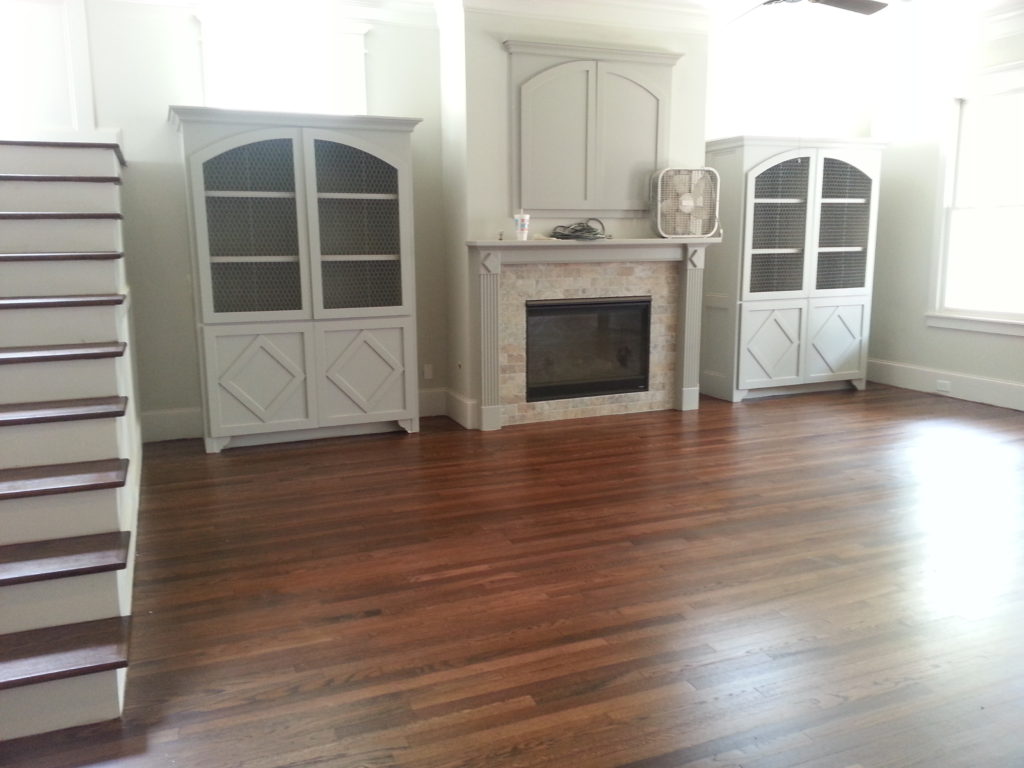
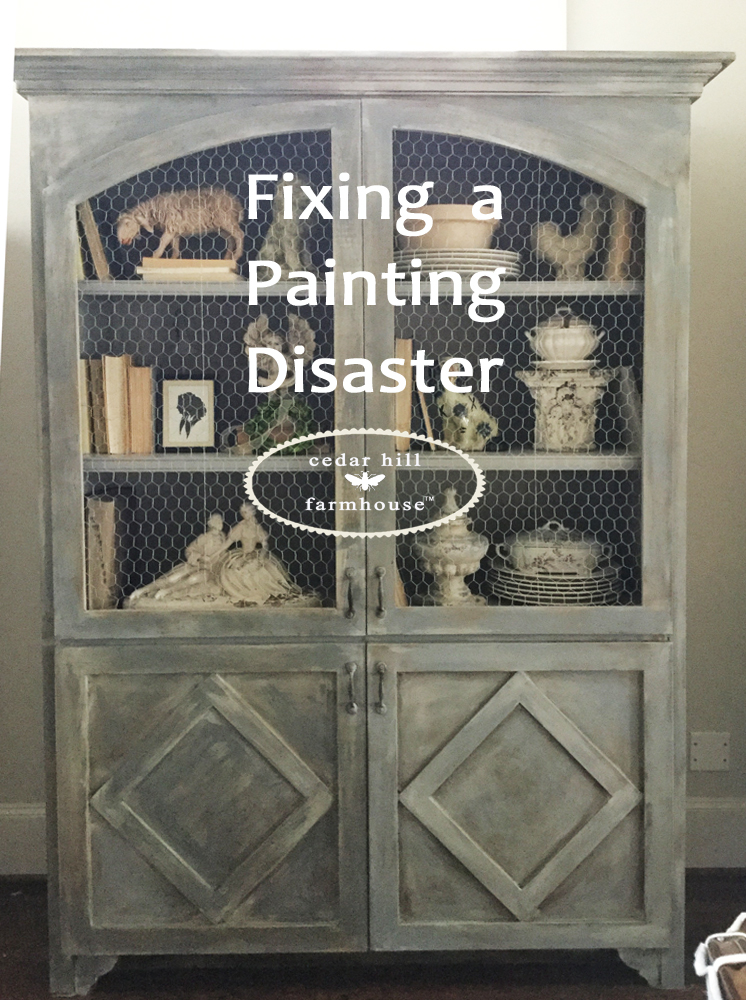
Before I show you the latest, let’s start at the beginning. I originally had these cabinets painted in a dark gray, although they don’t look too dark here.
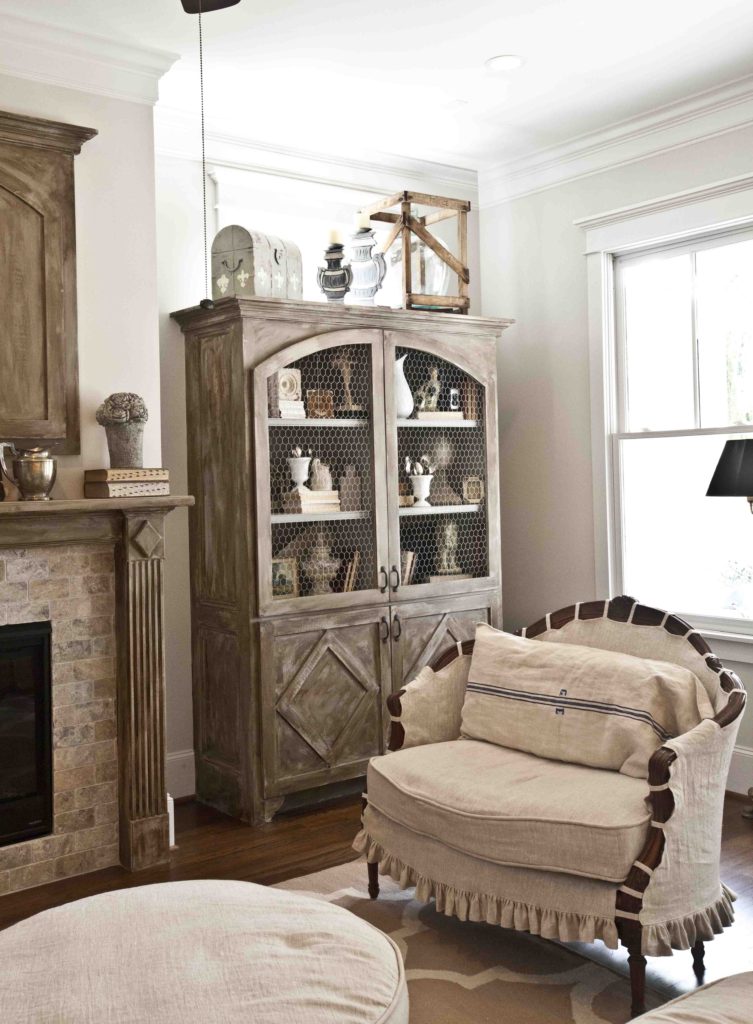
They looked too flat, so I added a dark brown wax. You can find the story HERE. You can see just how different the color looks when you add wax. I liked the change.
I thought it looked great. It was a bit streaky, but I really loved it.
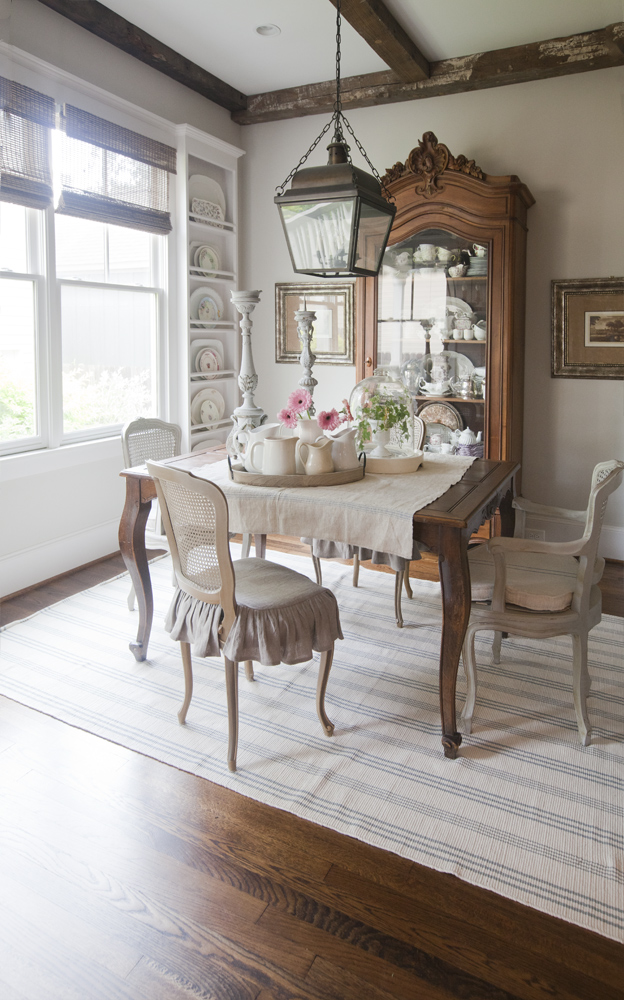
The darker color went with the beams on the other side of the room.
The cabinets ended up in several magazines including Country French magazine just exactly as you see them above.
Well then, I decided they were too dark and splotchy, so I added some liming wax, which lightened the cabinets, but made them look even more splotchy. See the full story HERE. Of course every time I make changes I have to do the fireplace, the TV cabinet and both armoires, so it’s no small chore.
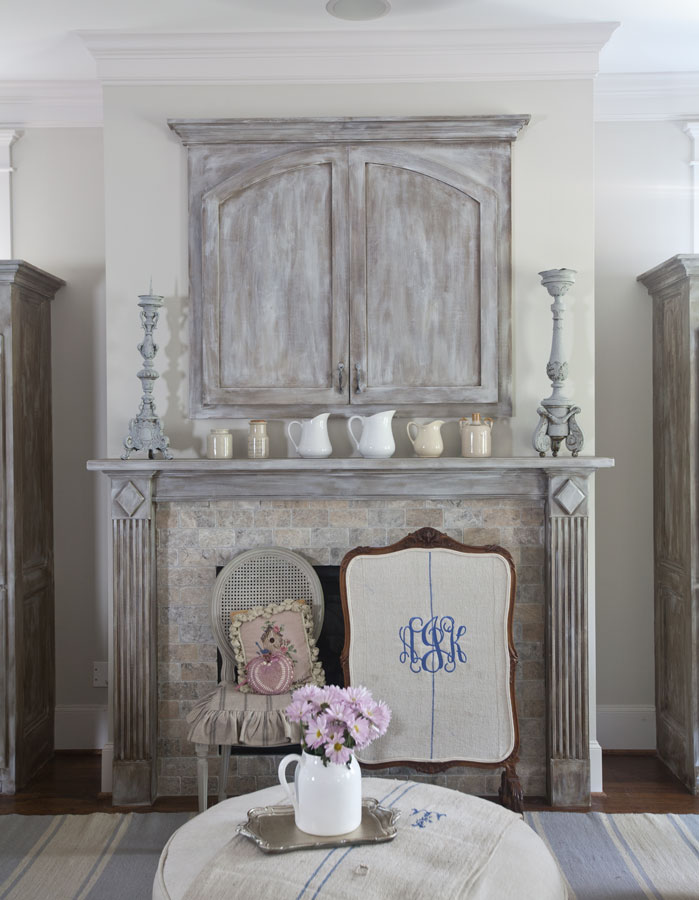
So really didn’t like the look then I got the Segreto book to review. Seeing all of those amazing finishes, I set down the book and decided to add a layer of blue/gray milk paint to the cabinets. “What?” Yes you heard me correctly. Sometimes I might be a bit impulsive.
I decided to add a layer of blue/gray milk paint.
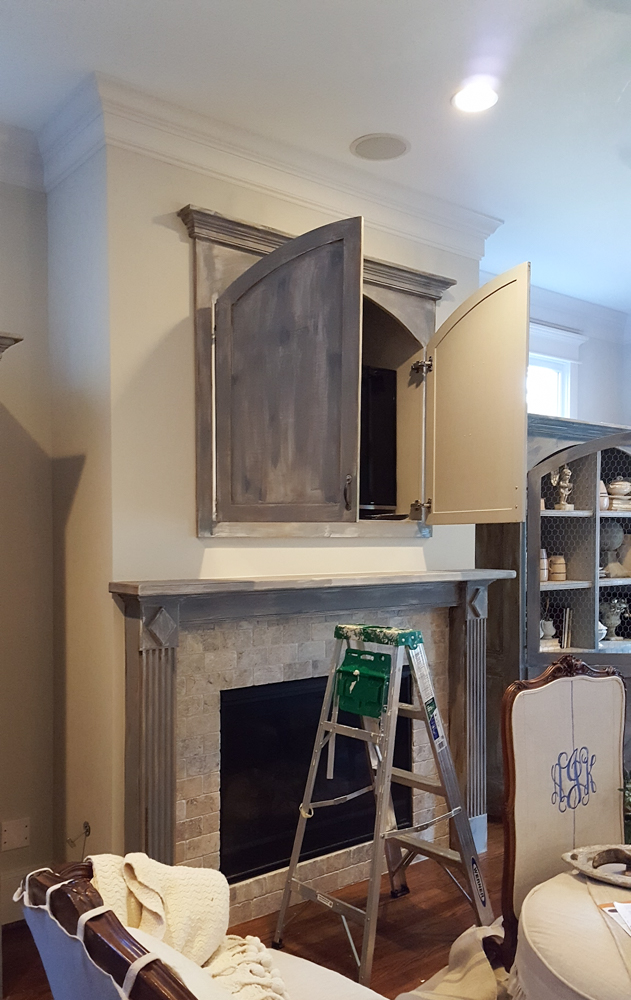
I was now at the ‘What have I done?’ point.
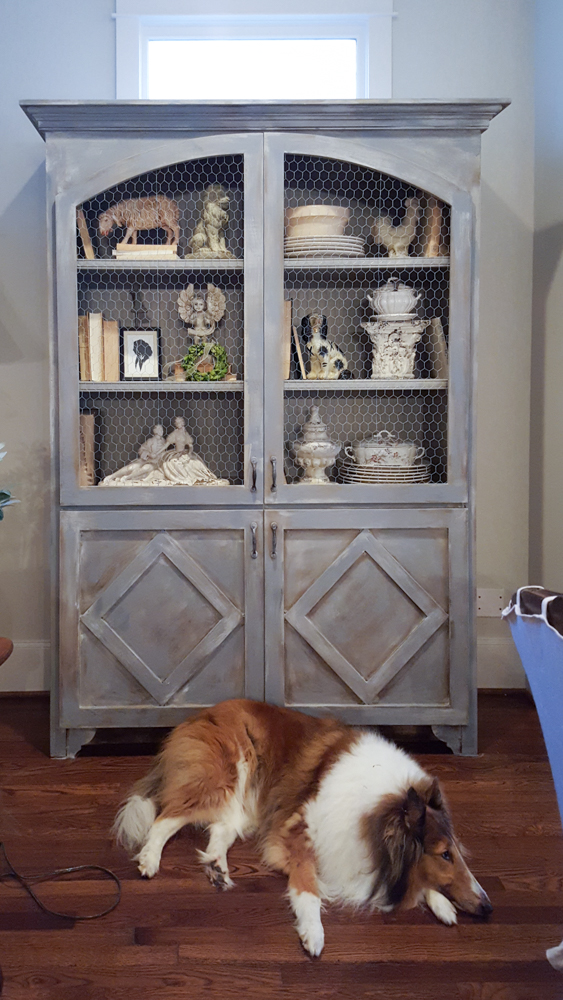
Molly said, “Here we go again. Mommy, just paint around me.”
I hated it. I was wondered why I even picked up a paint brush because now my cabinets were ruined and I had to fix them right away. My husband didn’t bother to say anything, smart man. I basically painted around him and the dog. The cabinets looked flat again.
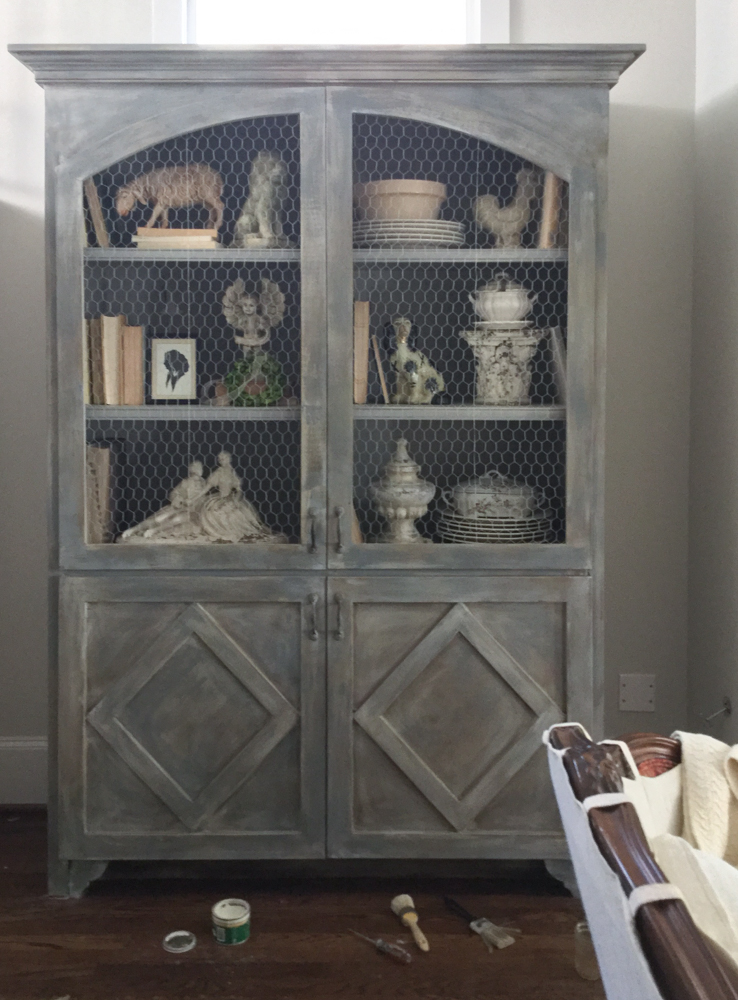
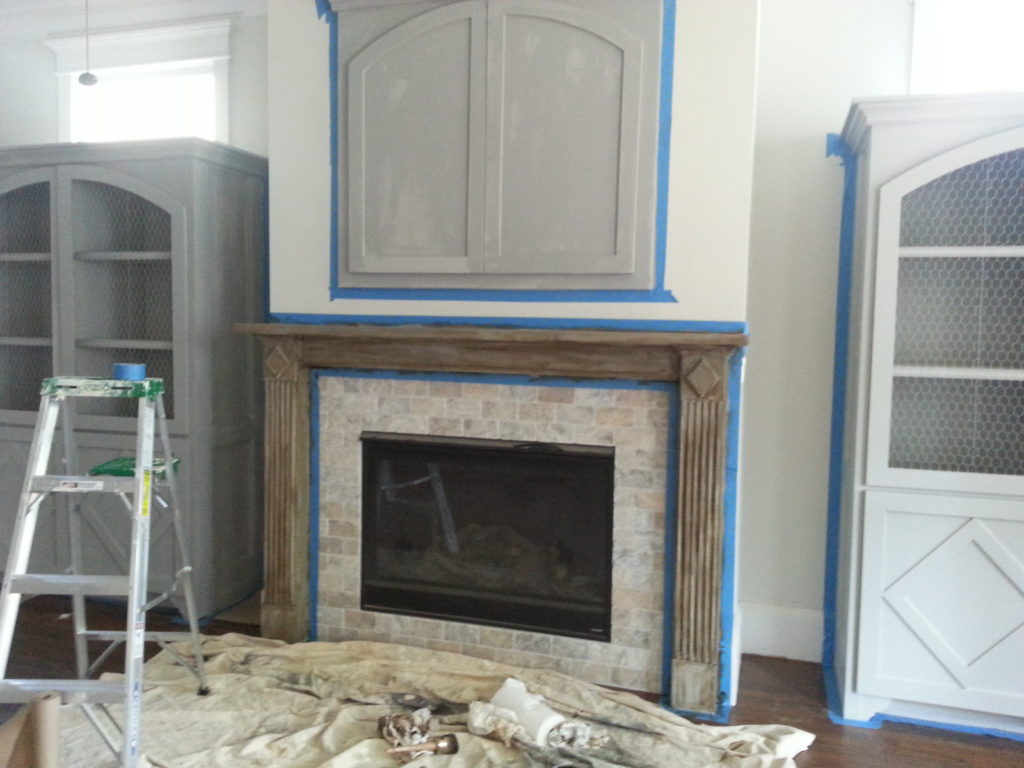
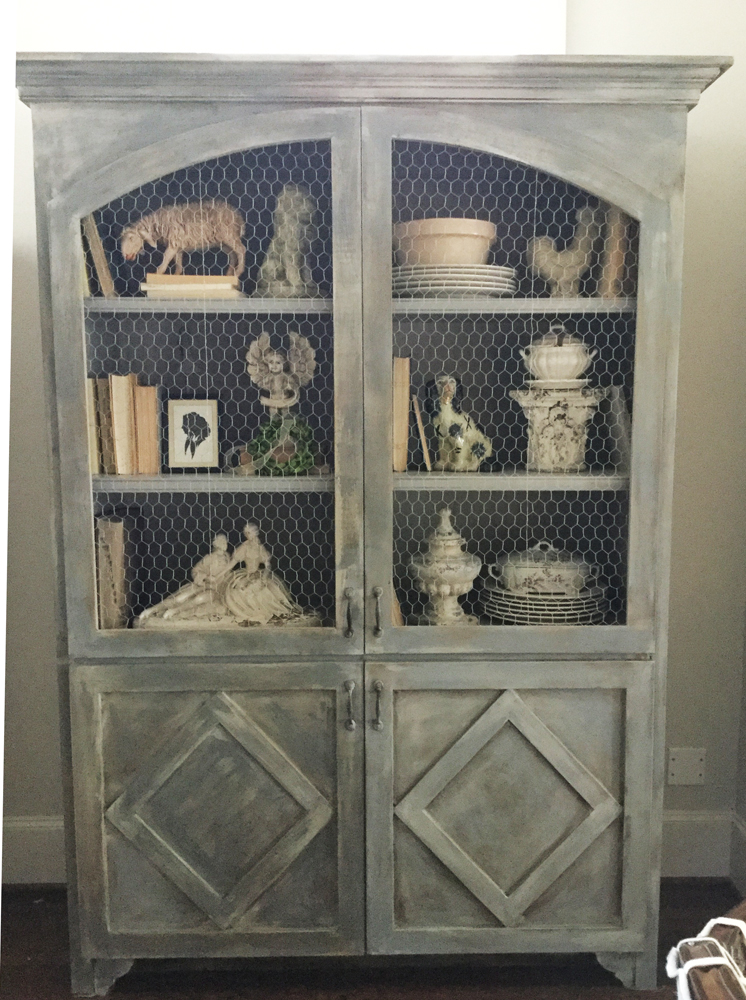
It looked TOO FLAT. So now I was rubbing away some of the milk paint and adding a bit liming wax and some light antiquing wax, hoping I could fix things without having to add yet another layer. See below I started to remove the paint? The left side has the paint slightly removed, while the right side still has all the milk paint on it.
There’s only a few days left to enter my giveaway!! Details here.

I also moved the pediment from my kitchen from here,
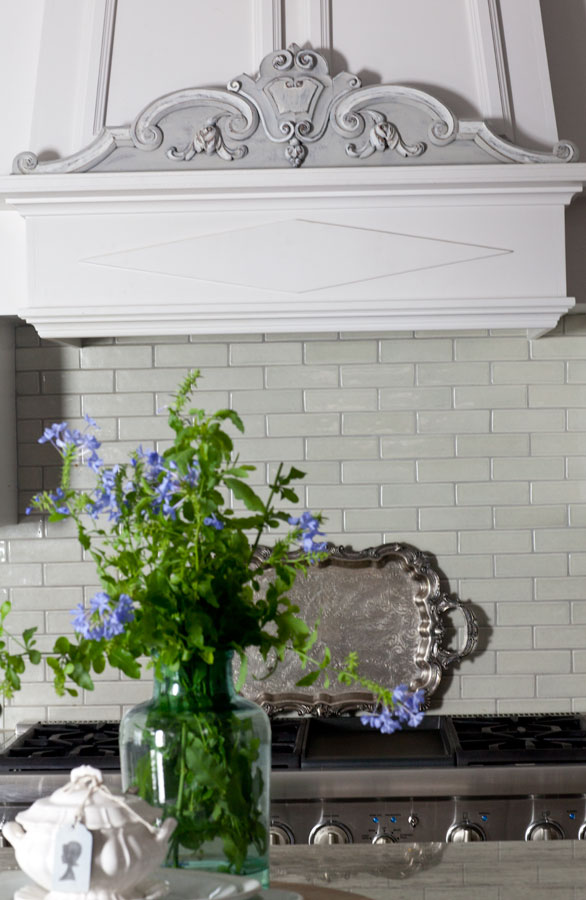
to here, because why not add even more work to my weekend? Yes I roll my eyes at myself.. a lot!
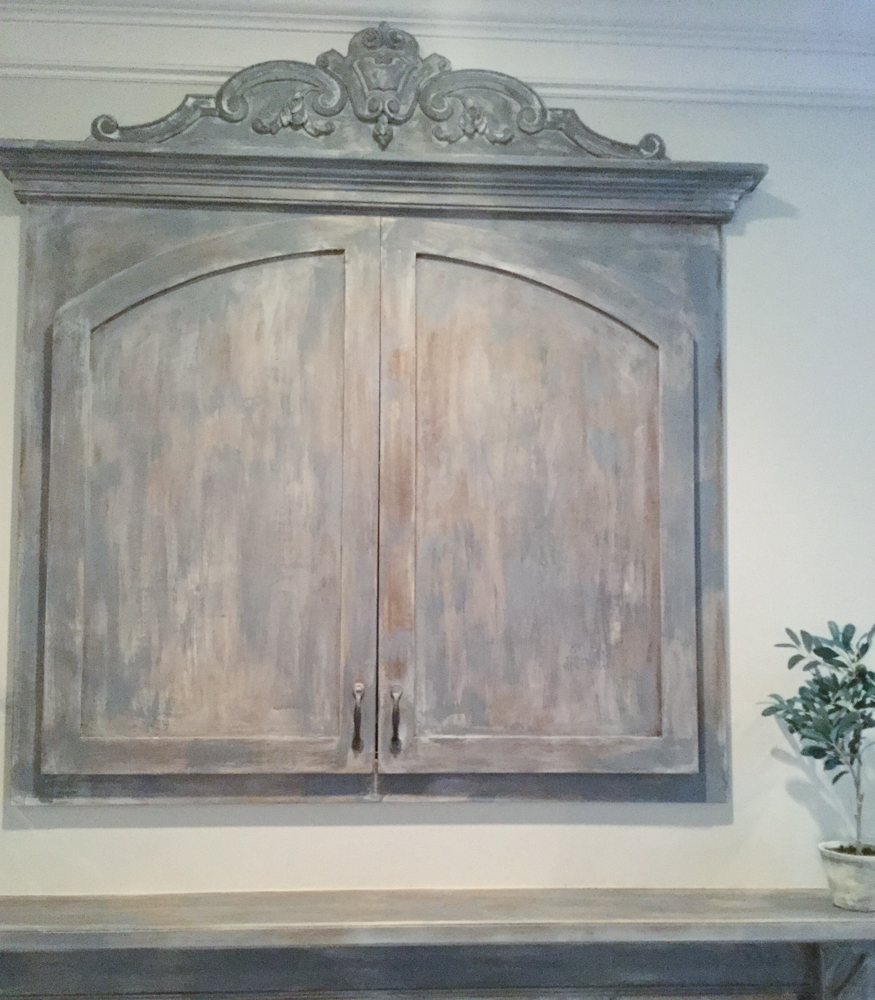
This was difficult explaining to my husband that I wanted it distressed but not blotchy. Too little variation and it looks flat, too much and it looks uneven.
He just dutifully nods as needed.
I’ve highlighted what was done with each stage.
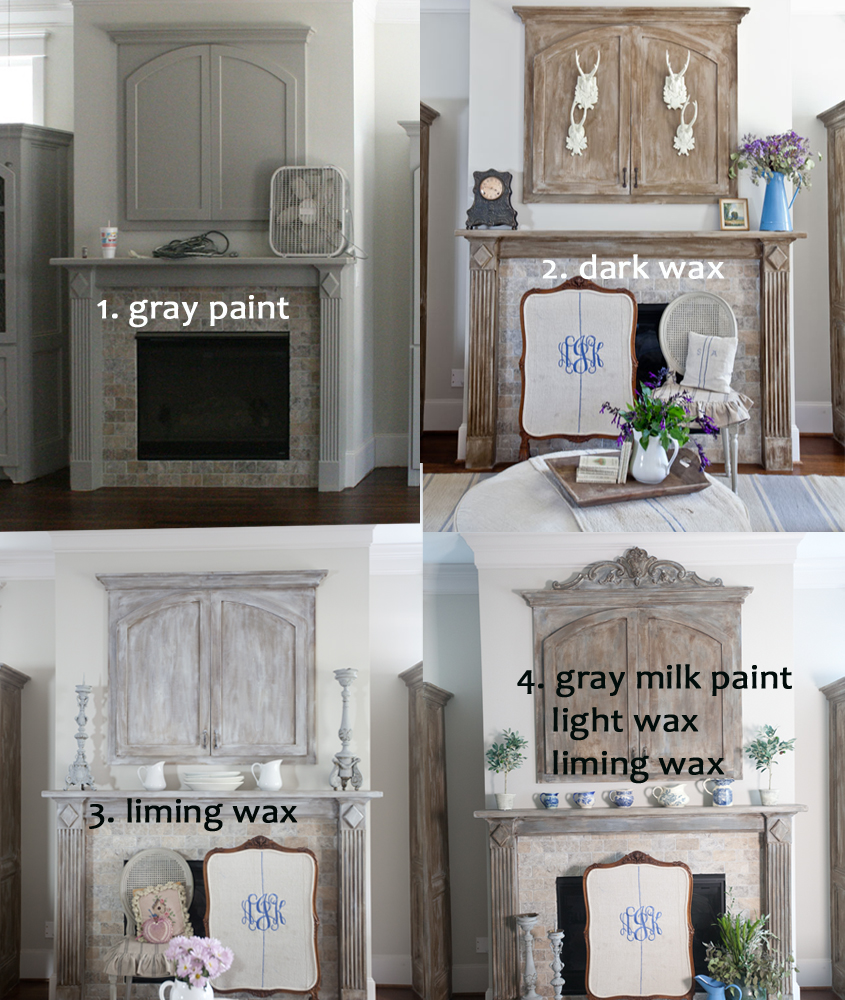
At first I feared it just looked like #2 again after I spent an entire weekend working on it. But now that I see it all side by side, the newest look is much more subtle, and that is what I wanted. I wondered if you could see the difference in the photos, and that’s why I put them all together.
I actually like the new look, but I don’t know if I would have started it, had I known it would take an entire weekend.
So my lesson to you is
Do as I say, not as I do.
MAKE SURE TO USE A TEST BOARD! Don’t just start painting a big piece of furniture if you don’t have your technique figured out.
It turned out okay, but I think I’ll forever refer to it as my ‘lost weekend.’ It reminds me of the weekend years ago that I spent outside stripping the finish off some antique chairs. Occasionally I would peer through the windows to see my housekeeper in the air-conditioning, happily cleaning away, laughing with my family, while I was miserable outside.

Nice cabinets! You certainly have patience and skills♥
While I am sure it was a lot of time and work, they look beautiful now. Great job!
When I was a kid in the 60’S, everything was painted battleship grey from WWII era…I don’t like grey. I do love your end results and you were right to make the long weekend to get your result. I will take your advice to do testing on a smaller piece, however.
Thanks for your site…I look forward to it each morning
I love this post!! Who among us has not done something similar?! Haha!! At least the end result was worth it!! 🙂
That certainly was a lot of work. God bless you. The cabinets are amazing.
I have the same mistakes as well. It is funny how your husband know just not what to say, mine is the same.
I have heard of this “test the finish first.” I can’t say that I have ever taken this advice. LOL
Oh my goodness Anita. I’ve been there and done that…I feel your pain. My buffet we use as a media cabinet was like that for me. I painted the whole thing three times. I titled the post about it “French Buffet That Gave Me Fits” because it really, really did. Sometimes when I’m watching TV I look at it and think it would look great painted…. I have to remind myself to just leave it alone.
I liked all the options you have had it but the final one is the most subtle.
Nancy
Wow a lot of work, and I am lying awake at night thinking about the 40 doll house (made by father)that I am trying to restore!!!! I just washed it (having been stored in a garden shed for 15 years with Pine Sol, took some of the paint off the black roof!!!!! Should have tested it before!!!! But it needs repainting anyway, we have lots of New Charleston Green which looks black but has a hit of green in it and it will look spiffy!!!! Now to do a change the peach bathroom in the dollhouse!!!! yes!
I’ve now painted several pieces using chalk paint. For the finish, I use a paste wax in either clear or dark. I love using the dark to bring out that vintage look. I let the wax cure overnight and then go over it lightly with steel wool. Finally, I buff it out and it has a beautiful hard wax shine. I’ve found this to be an easy process and it’s never failed me yet. Btw, I’m in love with paste wax. I’ve been using all over my house, buffing and polishing all of my wood. I must be crazy LOL.
Who makes this paste wax? And where do you buy it? I flip flop between Amy Howard and Annie Sloan. I prefer Annie paint and Amy wax.
Hi, I use the Minwax brand and I buy it from Lowes or Home Depot. I haven’t tried any others yet but I have been very happy with this brand. I’ve only used the chalk paint from Joann Fabric by Folk Art Home Decor. I wanted an ivory color and found one called Sheepskin that I really like. It comes in 8 ozs. and is super inexpensive. I painted three pieces with 1 1/2 bottles: one piece is 54″ wide x 18″ deep x 30″ high; the other chest is 38″ wide x 15″ deep x 30″ high, and the third one is a very small chest 24″ wide by 13″ deep by 26″ high. I would like to do something with color and plan to try the Anne Sloan paint. I just haven’t made up my mind yet on what project and which color to use. I’m from a small town so I have to order the Anne Sloan paint which drives me nuts since I’m a person who likes to see color up close and personal. I like to get the feel of color before making a decision. Hope this helps. Thanks for asking.
I forgot to mention that I found the chalk paint to be a bit thick so I did water it down. I’m not sure if it was old or that’s normal for chalk paint.
Anita, I would have been paralyzed by fear after the second finish!!! I can only hope I would continue on to get your final beautiful finish!
Anita, you are a brave and determined soul. It was well worth all that work, they are beautiful and a custom color all your own.
D
Ah, the joys of furniture refinishing. Been there and done that but such is life…
Anita, you are a very talented and energetic lady! I like #’s 1,3, and 4. I would be happy with any of those options, but I think your final one is a winner. Now you can relax and enjoy the fruits of your labor.
We have all had similar disasters and in our initial project enthusiasm we’ve all ignored the very sensible advice to do a paint test first. I remember thinking that how gorgeous that “dusty rose” paint would look in my bedroom – with 10 foot ceilings – that I spent an entire weekend painting. And then waking up the morning after thinking that someone had just vomited milk of magnesia all over my walls and running off to the paint store for a new color. Personally I’d love to paint all the golden oak stained cabinets in my kitchen to some soft ivory shade with antiquing highlights. But I’m a little worried about having a similar disaster.
I’m sorry to post this, but I don’t care for the finished product. It looks too blotchy. I prefer the grey paint. You sure are a trooper for hanging in there.
I enjoy your blog.
The end result is very nice but I’m tired from just reading about it. 😉
Love the pediment above the TV cabinet. At least that was fairly simple. Lol
I love all the finishes, but I tend to lean more toward the gray one. You have such skill and perserverence!
Glad o know I’m not the only making regretting some “improvements”. Twice I worked straight through a night to fix a mistake and was still at it when the sun came up!
I love them!!!
You are my kind of girl, love them all but the original gray is my favorite. If you’re like me and most in decorating blog land….. you like change and when we decide to do something we go for it! I’ve had similar experiences and there is the panic stage followed by an ahhhhh, love it phase!
You make me laugh…thank you for sharing your process. I am so neurotic, I could feel every obsessive painful decision you made to change them until they were PERFECT! It is a beautiful space, and your labor of love should be enjoyed for many years to come! Go make yourself a cup of tea, sit down and put your feet up, while looking around, basking in the glory of your creation. ❤️
I love, love, love reading your emails each day. I also LOVE The French covered chair in the 3rd photo. Any suggestions where I can find such a treasure. Great chairs are difficult to come by. Thanks for sharing online. You are an inspiration , have been since I first read.
Ginger Brewer
They don’t make them any more Ginger. Check my post on Saturday, and check out the chairs and where to buy them.
Oh yes I have been there! Next project will be kitchen cabinets. Test board for sure.
Your finished cabinets are beautiful.
What a pretty finished product! I love the “custom” color. Practice makes perfect, so is said.
Can so relate!!!!!! I too have started those projects that you think won’t take that long or be that hard and you start….. and then have it almost right…… decide to do one small change…..and voila you’ve gone too far….. thinking I just should have left it!!!! But we are doers and stay at it until it is perfect!!!! I am a Faux Painter by trade….. I have had my own Business for 26 years and have done every kind of treatment on walls and furniture ( Venetian plaster one of the most timely treatments, my tiny powder room took me almost 2 weeks…. my husband thought I had moved in there lol) with all that said I think you did an Amazing job on the cabinets at every stage… I loved them all…. but it’s so rewarding to stay at it and get it just right!!!!! Roxann …….. P. S. love the husband walking by not saying anything …. mine knows better too!!!!! 😉
I love the end result! WHat energy! One weekend for you would be 4-6 for me, but I love that you shared it all with us. thank you!
Oh Dear!!! Bless your heart!!!! That’s just too much work. I think I’m partial to the grey with maybe a little distressing? I don’t know…. too many choices!
OK, now I’m getting nervous about repainting my kitchen cabinets and walls! A test board for sure…
Thanks for the reminder on that! Just hope I have the patience and perseverance you had…
So, we all learn from our errors. I love the finished look
Looks great, and the style of the cabinet is unique. Where did you find that wonderful rug?
Well among other things I admire about you, I will add courage and perseverance! WOW. I would not have had the guts to go down this road. Good for you. The cabinets look great. And its so nice to know that great decor is not always easy to achieve, even for the pros!
I like them all, and think they all compliment your home. Check out the painted finishes at EdithandEvelyn blog site ..she does some lovely aged finishes with tutorials that may give you further inspiration….on another project though..these look lovely!
Holy Cow!! What a job. Great result.
I am having this problem staining my FP. . . . 4 colors & it still needs to be less gray! You have my empathy!
Great post! Glad to know that I’m not the only one who makes mistakes. Love the finished product! Thanks for sharing!
Wow a lot of work but at least you finally got the look you like.
As I have become “blog addicted” it would appear that seemingly every project turns out perfect in these blogs (along with the perfect house). How refreshing to learn that others have the same problem as me in that I can’t relax if my eye perceives something as “just not right” and won’t stop until I fix it despite others saying, “It looks fine.”
After your first liming tutorial I purchased (online) liming wax but haven’t used it yet; thanks for the heads up!
My eyes perceive that now everything you have done resulted in a soft blue gray and I would have to say, “It looks fine.”
I like the latest the best – it was worth the whole weekend.
Hahaha…..been there too …..
One technique I learnt from a professional in France, if it is too blotchy, have some very, very watered down paint in a dish, go over with a sponge in one hand for the watery paint and have a dish cloth in the other hand work with the two hands alternatively and even out the blotches as you move along
All hard work but rewarding ??
Love it. The French are all about beauty, and the finishes you see that are centuries old may have gotten that way via trial and error. I’ve done the watered down technique many times, and found it to be superior, and wondered if it was a well-known finish. (Ask Segreto)
Anita, I would tone the cabinets once more. Sand, water down gray, and dark wax finish. They’re almost there!
Story of my recent life… who has time for test boards? You’re my hero.
Painted basic guest sleigh bed white…. but should have sanded first. Even though it was chalk paint– heavy poly finish was coming through. Waited weeks to sand it all down.
Sanded then painted Paris gray or one of those…waited weeks .. dry brushed French linen…sanded a bit to smooth out splotches.. it’s been a few days… need to do the next step… now with layers– I’m afraid to mess up cause I don’t want to start over again. But– the end is always worth it. I can never just put one color on and wax it in with clear wax– that would be too easy… Thanks for continually inspiring us with your works in progress. My husband knows by now not to say anything– except to joke when it’s over…
Oh, and love your result!
the 2 hutches are lovely pieces of furniture. I loved them best in the gray but that might be that I love gray and not a fan of distressed pieces…if you are happy now, that is all that matters…and they do look very nice. I, too, am having a problem with an inexpensive HUGE board I bought for one spot in my dining room, it didn’t fit and where it DID fit is not my choice at all. I’ve lived with it for almost a week and just hate it so the sign is going back to Home Goods.
oops…meant to add you haven’t ruined them at all….:) xo
I wish when I ruin something, it turns out this gorgeous. Beautiful results.
I’m glad I didn’t get this post until after I’d done my first chalk paint project! The success stories gave me the courage to try! I started “big” by re-inventing my French Provincial hutch. I was tired of the golden oak and the “leaded glass” doors. I took out the glass inserts on the sides and had my son-in-law cut 1/4 thick panels to fit. Then we cut the doors–more challenging since the doors are arched! I added Efex appliques to the new doors to give them more depth and dimension. I used Annie Sloan Chalk paint in pure white and a clear/black wax mix. The challenge was in mixing the same 7 clear wax to 3 black ratio every time! The overall look is aged grey. I love it! Looks more like an armoire than the buffet/hutch I started with. Love having the closed storage too. One more trip to the hardware store for longer screws and I’ll officially be finished! Thank you for the inspiration to tackle something new.
Does it look much different when you see it in person then the camera ? To get something to a point where you can say yes , Love it .! Makes a piece of art ! Great job !
Thanks for the inspiration. I have dinette chairs painted Paris Grey, but they were looking flat.. Decided to dry brush with white . Only one finished, but don’t really like that either. Will coninue now, with some of these suggestions. But, I think new fabric on the chair is needed. We covered the seats a year ago, but I think I picked wrong fabric color. Always evolving
I just learned how to do a wash. I love the finish. You take a water bottle spray on water in a medium mist, then paint over the water in the new color you are choosing and then take a dry cloth and wipe off gently. There are lots of videos on it on YouTube. I just did my four dining room chairs linen white and went over with two different colors Paris grey and Selznick grey. Wish I could post some photos here. Then went over it all with a light antique wax. They look great!
I bought a beautiful sideboard at Round Top (Fall 2016). I decided to stain it a darker color to cover
some stains. It is TOO dark, so I am sanding off some of the stain.
Stains are hard to apply (at least for me). I had a problem with streakiness. However, lots of sanding,
and I like it better. I plan to apply a lighter stain to the areas I have sanded.
Wish me luck. I had this terrible feeling I had ruined the piece by staining, but I am now hopeful.
I love reading your daily blog! I can’t wait to see what you post next. I have done a lot of furniture painting lately. I was afraid that once I wax I was stuck there forever. I did t realize you can paint over the wax, or do you have to completely sand it off first.
I definitely think the final result is the most attractive, but you poor dear! I would have had a nervous breakdown with so many “mistakes”! I also really love the pediment atop the TV cabinet. Just the touch it needed.
Your pain is my gain! Thank you for sharing. Even talented people like you can take a detour to perfection. I never heard of liming wax . Can’t wait to see if my kitchen cabinets can become pickled oak.
The end result if beautiful so I don’t think you wasted your time. lol! Anything pretty takes work. I lose whole weekends to migraines so I would love to spend time doing what you did instead. You amaze me with your insight and talent!! You are so gifted and I am so grateful you share with us!!
Yes indeed. Been there and done all that. At some point I had to decide I’d tortured myself enough. Your finished product is beautiful so I suggest you walk away from it and take a breath and call it finished. Tell yourself you’ve done your best and know that the rest of us who love your blog think it is really beautiful. It is Really beautiful.
Really!
The many comments prove that this situation has been a common one. I sometimes think I love a recent change and then one day it just doesn’t thrill me. I tend to think long and hard about a project before starting but many times am impulsive and charge forward with the change because I know fear will leave me stuck and I hate that even more. I don’t usually say much to my husband (I think everyone can guess why) but bask in his praise if he likes it. He is wise enough not to complain if he doesn’t like it. Thank you for being honest about your process, I think that encourages us!
I loved the pediment in the kitchen but it does look awesome above the fireplace!
I admire your persistence. I would have totally given up for that weekend and thought about it for at least a week, and probably done some test boards. I’m compulsive about following instructions especially after the first disappointment. I also very much appreciate your willingness to share your less-than perfect outcomes! Does my heart good to see that others have the same challenges I do!
I love the end results. Great job! Lot of work though, so I take my hat off to you
My plan to update my dining table and chairs with chalk paint and a darker stain on the tabletop ended up as a two + week “add-more” project! I painted the legs/tableskirt and tried adding some highlights to the carving. After trying two colors, I gave up! I also tried glazing but wasn’t happy with the darker glaze over cream paint. At least I decided I didn’t like it before I added glaze everywhere! When I was happy with the color of the top, I put on the topcoat and thought I was finished. It looked great but when I looked at the room as a whole, I decided the colors on the table just didn’t work with the gray hutch. My solution was to add a wash of gray chalk paint over the Java top. I lost count of how many layers of stain, topcoat, paint and topcoat on my tabletop but I like the end result!
So happy the story had a happy ending Nancy. It takes a lot of experimenting sometimes to get the look we are going for.
It’s nice to see other people make mistakes; not just me. Lol
Then you should love me Robin. I made a bunch of mistakes all the time!!!
Beautiful cabinets (only the outcome matters)!!