You are going to love this kitchen redo by Cindy from Edith and Evelyn Interiors. You will be amazed at what she did with a builder grade kitchen, turning it into a dream kitchen. Let’s find out how she did it!!
Hello Everyone!
My name is Cindy and I blog over at Edith and Evelyn Interiors! I am so thrilled to be guest posting over here at the amazing Cedar Hill Farmhouse today!
We recently purchased a 1970’s French Country Ranch home that was in need of a total renovation. The house had such great bones and beautiful custom features, but it was stuck in a 1970 time warp, complete with flocked wallpaper and pink shag carpet! We knew we could save a lot of money by doing the renovation ourselves, and though we had never done anything like this before, hubby and I decided we were up to the challenge! I thought I would share our recent kitchen renovation with you today, along with a few simple tips to get a similar look in your kitchen!
Here is the before!
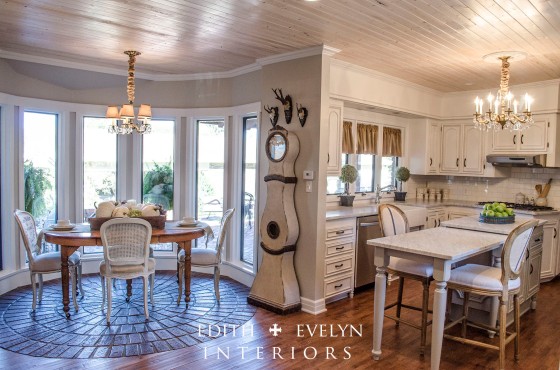
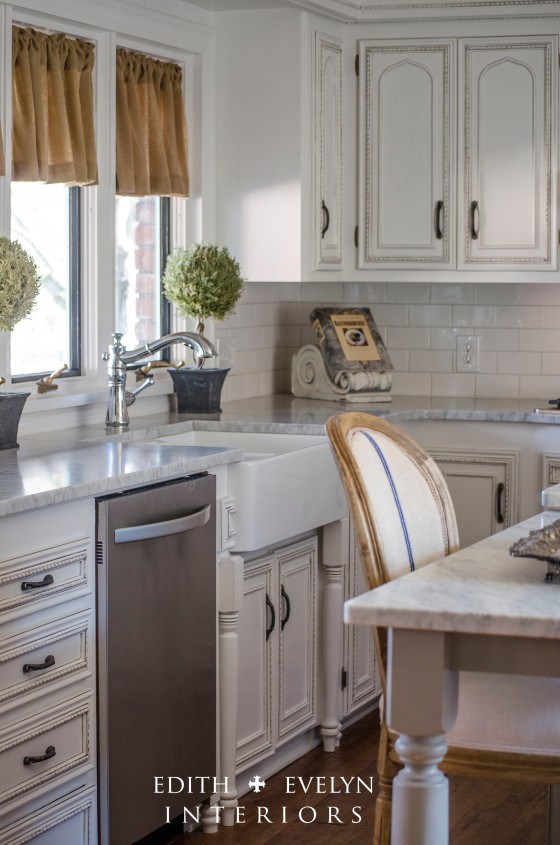
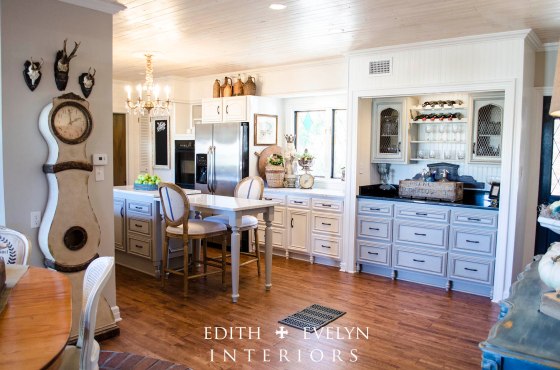
And here is the after!
It is quite the transformation, don’t you agree?!?
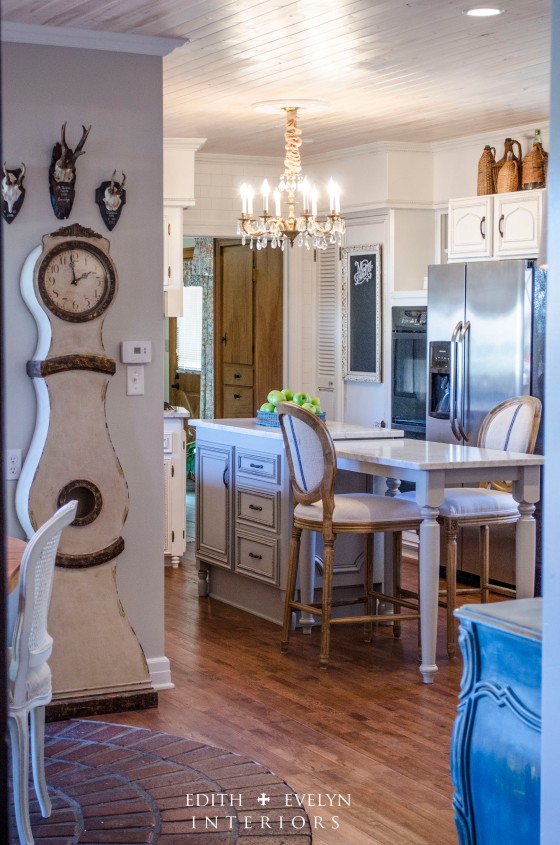
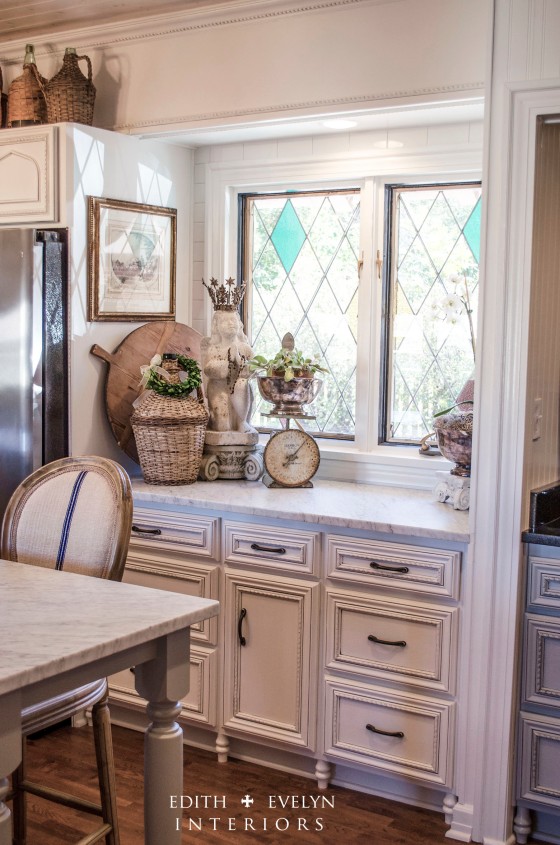
One of the easiest and least expensive ways to make an impact is paint! We painted all of our cabinets, walls, and trim, with beautiful neutral colors of white and gray. It immediately lightened everything up. Before, it was so hard to see all the beautiful details (the circle of brick on the floor, the lead glass, and stained glass windows) when everything was so dark.
Popcorn ceilings. Every room in this house has popcorn ceilings. Every.Single.Room. Even the kitchen. Ugh! We decided to plank over the popcorn, which turned out to be an easy fix and it gave the kitchen an amazing french cottage look. The planks are a lightweight tongue and groove wood, purchased at the large home improvement stores. They come in packages of eight planks (about $15.00/pkg.) and are a wonderful, inexpensive way to update an old ceiling. After we installed the planks, we pickled them with a whitewash stain. Every person that walks in our kitchen is instantly in love with that ceiling!
We had to gut a few cabinets and a wall in order to open up the kitchen space, and even though we tried to salvage as many of the original cabinets as we could, we still ended up having to install new cabinets in a few sections. This presented the challenge of trying to match the new cabinets with the old, so that they blended together cohesively. We ended up buying stock, off the shelf cabinets from the large home improvement store. To give them the custom look we wanted, we added decorative wood trim to all the cabinets, new and old. Once they were all painted and glazed to bring out the details, all the cabinets work perfectly together.
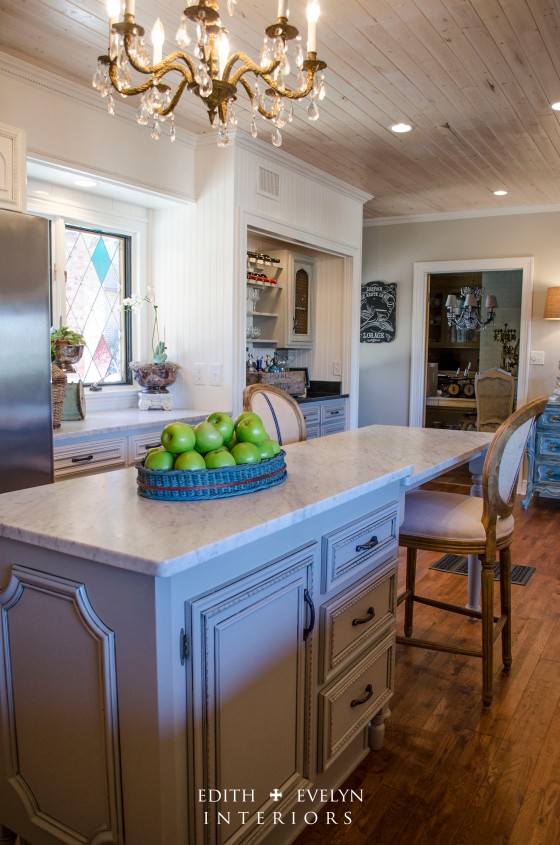
I have always loved the look of furniture in a kitchen, and knew that I wanted this feature in mine. Adding furniture legs to the underneath lip of the cabinets did just the trick and instantly transformed the look of our kitchen! Again, we purchased ready made, turned legs from the home improvement store, cut them to the length we needed, and glued them with contractors glue to the underneath lip of the cabinets. Once painted the same color of the cabinets, they look as though they were custom made!
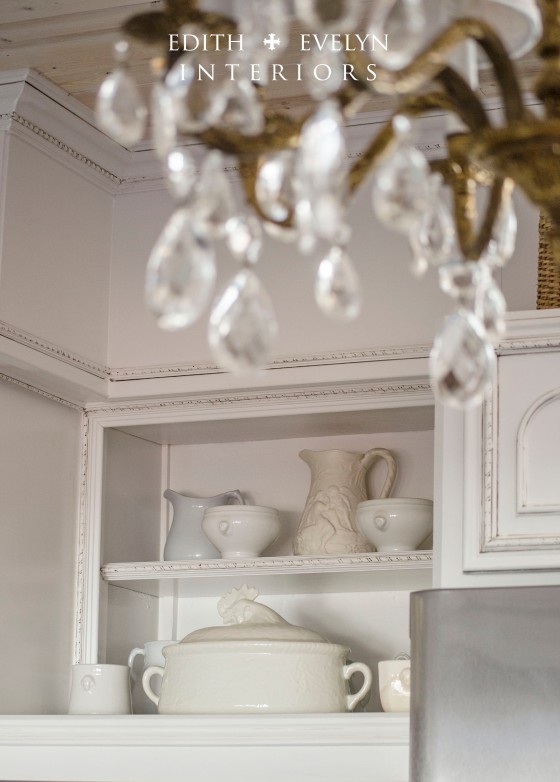
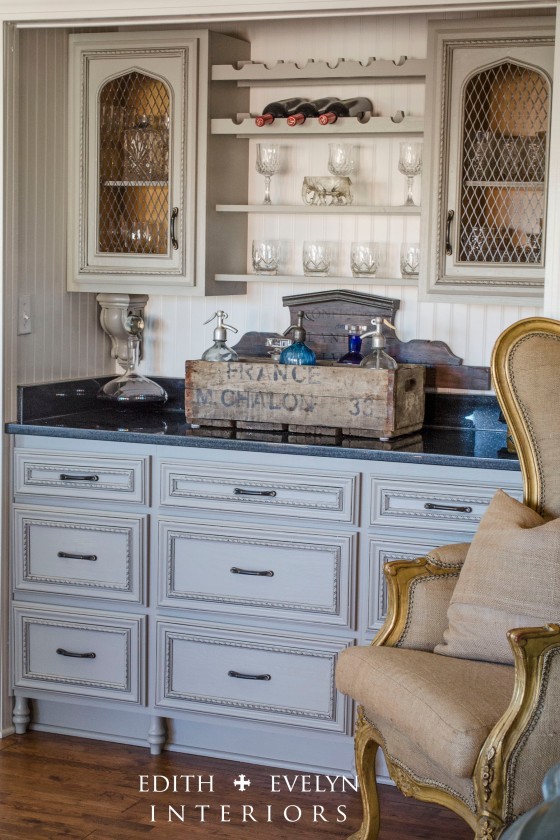
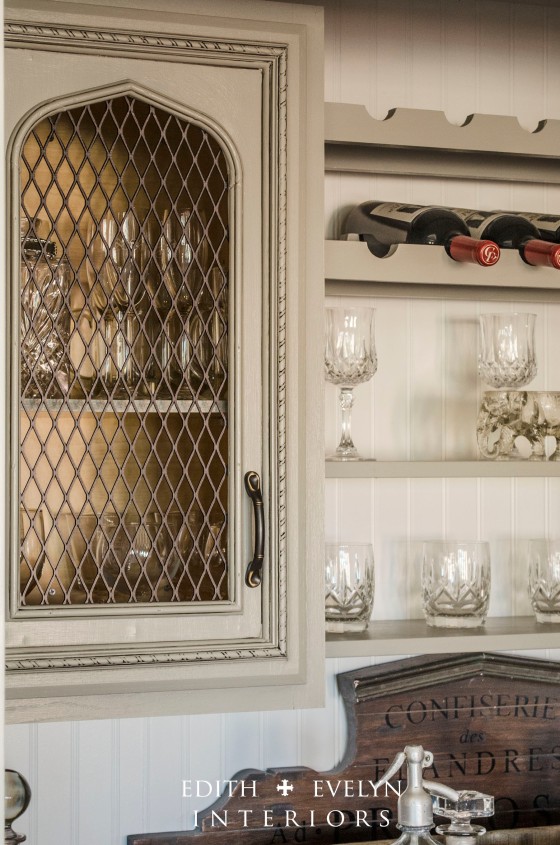
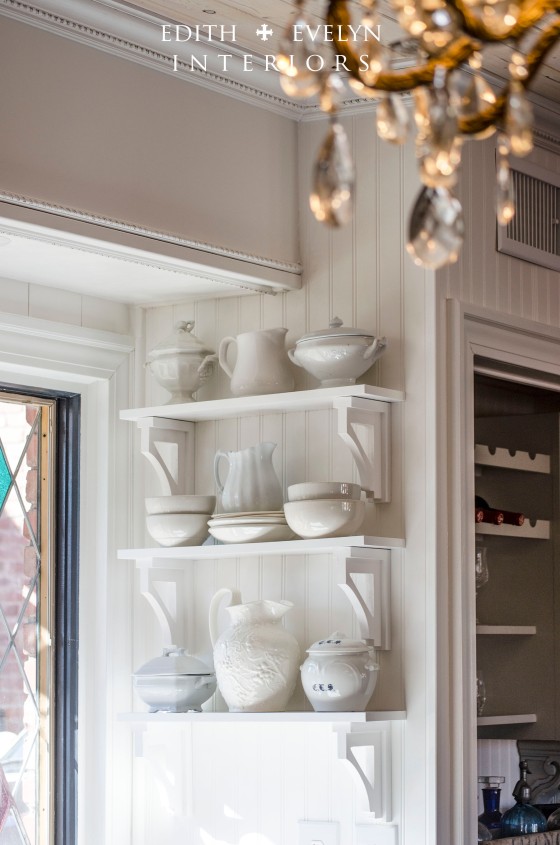
I wanted to add some open shelving in a few places to display some of my ironstone collection. We easily achieved this by simply removing a couple of doors to an upper cabinet (it was too tall for me to reach anyway) and painting the inside the same color as the cabinets. We also added some simple open shelves to another wall, and modified the upper cabinets in the bar area, by cutting out the center of the door, and adding metal grate to the backside. The grate is actually replacement grate for a bbq grill that we painted in oil rubbed bronze paint! Very inexpensive for a fabulous look!
 We shopped second hand stores, thrift stores, auctions, yard sales, Craigslist, and the Habitat for Humanity ReStore. It’s amazing what you can find with a little bit of legwork!
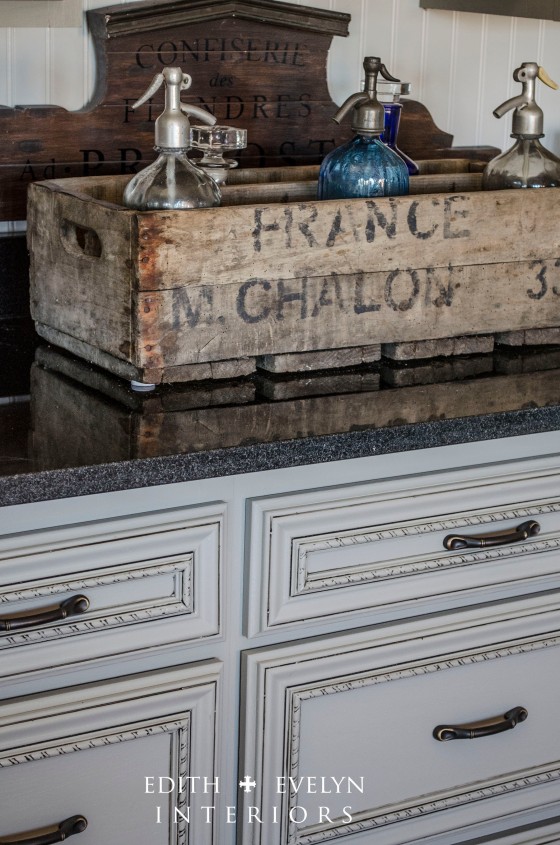
We also shopped the “bone yard” of our local stone companies for marble and granite remnants. If you have a small area that you are working on, it’s amazing at the deal you can get if you find a remnant piece of stone left over from larger install jobs. I wanted Carrara marble countertops, so we did splurge on that, however, we installed a black granite remnant from the “bone yard” for the bar area and paid pennies on the dollar! And it works beautifully with the gray veining in the Carrara marble.
And if you are buying in bulk, such as cabinet hardware, don’t be afraid to ask for contractors prices at the big home improvement stores. We always asked and we were always given a better deal.
It took us eight months to complete this kitchen remodel, probably because we were such inexperienced rookies! But we have learned that with the right tools and YouTube videos, we can do anything!
I hope you have enjoyed our little tour of the kitchen and would love for you to come visit Edith & Evelyn Interiors sometime and check out the progress as we continue remodeling the time warp!
Thank you so much Anita, for having me over today, I have enjoyed it so much!
Blessings, Cindy






Wowz. That *is* an amazing transformation. Love the brick and the stained glass, too. Beautiful job!
OMG, a new blog to follow. Thanks for sharing!
Beautiful! So many of these elements can be integrated into my home. It’s a 1990s traditional moving towards a 2015 casual and comfortable classic. I never expected French elements would work so well in my decor plan, but lo and behold…they surely are! Love, love the style. Love it….thanks so much for sharing this most wonderful kitchen.
Alls I can say is WOW! Shows what hard work and ingenuity will get you! I’m amazed! Absolutely love your home!!!
LOVE LOVE LOVE!!! Absolutely Beautiful!!
Oh, my goodness! This kitchen is just gorgeous! What a transformation and you’d never guess this was the same place. Thanks for sharing with us.
Be a sweetie,
Shelia 😉
Holy. Moly. That is one BEAUTIFUL transformation! Great job! I am so inspired!
Your kitchen is amazing! You’ve done a wonderful job transforming the space.
May i ask you what finish of cabinet hardware was used in your kitchen remodel? It looks like an antique brass??
Also, what color paint are on the walls? Such a beautiful room; enjoy!
Hi Kimberley! The kitchen hardware’s finish is oil rubbed bronze with antique brass accents, stock from Lowe’s! The paint color used on the walls is Sherwin Williams Agreeable Gray………inspired by the colors used in Anita’s home! It’s a gorgeous gray!
Very nice, but I think the “furniture” legs under the cabinets needed to larger legs, stockier, like wider. They look spindley.
Absolutely spectacular kitchen! Your hard work certainly paid off and kudos on your editing. All of your collectibles show so well.
What a gorgeous kitchen! Oh, if only it were mine…..sigh.
So lovely…so inspiring!
What a stunning renovation….I could not help but scroll up and down looking at every gorgeous detail!…Just love everything about the kitchen….and what a great idea for the flooring in the breakfast area!!!….Love, love this post Anita….hopping over to subscribe and follow this fabulous renovation!!
Holy guacamole! A “before” kitchen complete with avocado green appliances truly transformed! This is probably the most impressive DIY kitchen renovation I’ve ever seen. Beautiful job!
Beautiful! What a lovely diy transformation!
I love everything about this room.
LOVE IT ALL! You inspire me to think outside the box more as I pursue my kitchen remodel this year. Love the grill grate redo…so many great ideas.
They did a great job it is fabulous,thank you.
Absolutely a beautiful transformation! Love, love love it!!!
What a beautiful transformation! This gives me so much inspiration for my own kitchen remodel.
Hugs,
Sherry
Love the ceiling..we have popcorn ceilings as well… how did you attach the wood planks to ceiling. Thanks
Just beautiful. I have a kitchen to redo at some point and will use this as inspiration!
Fabulous, best posting on redoing a kitchen I’ve seen. Very clever appointments such as the BBQ grate. Love the finished cabinets and the trim used. Not my taste with so many pretty decorating items because it detracts from the structure of the kitchen itself. Over kill on decorating items seem to be the ” in thing” now. I have a clock like the one posted and was going to paint it . Thanks the idea. I’ve
enjoyed viewing your post.
Absolutely fabulous !!! Love all of your choices. I could move right in that kitchen and not change a thing and I don’t say that often. My walls are that color also. What color of base and glaze did you chose for the cabinets ? Also love the blue buffet etc. etc. etc. Will be following your blog 🙂
A great transformation! Thanks for sharing!
SO impressed!!! You completely transformed the whole look, not just painting cabinets and switching counters which feels like “putting makeup” on a kitchen. It’s an all new look. That’s not easy to do! So appreciate all the detail. The BBQ grate is genius and I see how that mirrors the leaded glass window pattern. Very cool detail. When first looking at the first “After” photo I had no idea this was DIY! So professional and probably added a ton of value to your house as well as the enjoyment you get!
CINDY!!!!! HOW RIDICULOUS!!!!! Pretty much salivating looking longinly at every single tiny bit of your kitchen!!!! I love your floors also and the color of the cabinets and the chandelier…..WOW!!!! You guys did an amazing job!!! Congratulations and have a fabulous time in there!!!! Thanks for sharing your life with us!!
Bravo to you!!! What a gorgeous transformation!
Wow!! This is just ridiculously amazing! What a transformation. I love all the details in here. Thanks for sharing!
Hugs, Jamie
This transformation is amazing! Every detail is just fabulous! I would love to know the color of the cabinets and how you did them. We are wanting to paint our cabinets but are undecided on the exact color and I love this look.
Hi! Thinking about doing this same transformation on my daughter’s kitchen cabinets. Can you tell me a few things? First, did you use a primer on the cabinets before painting? Also, did you use a spray gun to paint the grey on? Finally, did you cut out the doors and install the wire mesh? If so, do you mind sharing where you got the criss cross wire? Thanks so much. Just looks terrific!
kendall boggs
This kitchen transformation is gorgeous! I am so glad you shared this. I loved seeing what she did with the cabinet doors. So much inspiration. The addition of molding throughout the space added so much character, and the planked ceiling and floor accents are stunning!
So glad you liked it Rebecca.
Creative and beautiful transformation. Yep – another blog to follow. Will I ever get off the couch and away from the old laptop!?!
I absolutely love the ceiling planks! We also have popcorn ceilings over the whole house and I’d like to redo them to look like yours. What brand and color of planks did you use? And whitewash brand? I’ve been looking online and can’t find any that look as pretty as yours.
Thanks so much! Beautiful job!
Brittany, that is from Cindy of Edith and Evelyn. You might try the link in the blog post to go to her blog to ask her.
Can you please share where you got the metal grate for the cabinets? Online? Everything is so beautiful.
Alex, please contact Cindy of Edith and Evelyn for that information. That’s her home. There should be a link in the post.
This is an amazing Kitchen! Love every detail done here.
Soo beautiful…breathtaking!!!! I have scrolled and looked at every crevice and every detail! This is a “DREAM” come true….great job….a lot of us would love to have this!! Thank you for sharing with us…something nice for US to dream upon!! Congratulations?
Anita, just love the furniture legs under the cabinet. Outstanding detail that adds so much! Super ideas!!
WOW!!!!! What a clever couple you are. I love it all; however the grates, brick floor under the table & the stained glass windows are just so special.
What a transformation! WoW!! That kitchen just turned gorgeous!!!great ideas here!
It was well worth the 8 months of work!!! Spectacular!!!!!!!
Deb
Gorgeous kitchen! Clever idea of adding legs under cabinet bottom! Thank you for a great tour.
I’m ordering decorative wire grilles for a kitchen cabinet. I love that you used replacement Bbq pieces for yours. I’m all about that. However our openings are 12 3/4 x 24 1/2 and I don’t think they come in that size but I’ll look! So I’m looking in Van Dykes Restorers. What is your mesh size? They range from 1/4″ to 1 1/2″. I’m thinking 1″ would be close to what you have? If you could email me your thoughts. Your kitchen is stunning! Thanks
Annette, this post was written by Cindy at https://edithandevelynvintage.com/ I think she would be delighted to answer any questions you have.