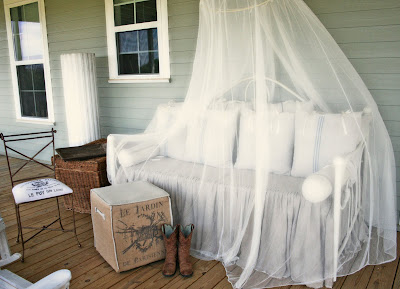
Are you tired of seeing the daybed on my back porch? I hope not, since I have another tutorial on the feedsack pillows. Today we will be covering this smaller pillow.
The daybed project can be seen here, the backporch project can be seen here, and the tutorial on the large feedsack pillows can be seen here.
First I started with a real-life vintage feedsack. I have purchased this type at auctions (auction tips covered here ) on eBay, and at the Round Top Antique Show, covered here. They have cost around $50 each. That may seem like a lot, but buying pillows made from real vintage feedsacks typically cost around $80. This one feedsack cost me $40, and I covered 4 large fairly large pillows with it. Here is how I made it work.
First I ripped out the seam with a seam ripper, making one long piece of seamless fabric.
Once the seams were removed, this feedsack was about 80 inches long.
Now I cut the feedsack into 4 equally sized pieces, one for each pillow.
For the back of the pillows, I used coordinating fabric and cut a piece the width of the pillow, and for the height, I cut the fabric the height of the pillow + 3 inches. That way the top would overlap when I used the ribbon to close the pillowcase.
Back to the front now. The width of the fabric was perfect for the pillow so I didn’t need to add fabric on the sides as I did with the other feedsack pillow project mentioned earlier. The height of the fabric, however; was too short. So now I was faced with piecing fabric together to make the front and that meant breaking up the stripe so it wouldn’t go all the way from the top to the bottom of the pillow. I thought it was going to look odd, so I needed to make the pillow design look like that was intentional. My solution? Make it look like the cream colored pillow has been inserted into a feedsack sleeve.
To accomplish that, I took a piece of the coordinating fabric and sewed it onto the feedsack. Normally you would sew this fabric on and have a seam allowance of 5/8 inch on both pieces of fabric. I actually sewed the solid fabric to the back of the feedsack fabric down about 4 inches from the top of the feedsack.
Once the pillow front was attached to the back, I attached the ribbon at the top as shown.
Here is our finished product, the feedsack pillow.
Oh see? I didn’t even show the daybed again.
Oops, I spoke too soon.

Another great tutorial. No, I am not tired of seeing that lovely daybed. Your porch is so inviting.
Anita I adore that daybed and now it is even prettier!!
xoxo
Karena
Art by Karena
I have an amazing Giveaway from the Artisans at Novica. You will love it!
Hello dear Anita,
thank so so much for visiting my blog… you are so right, it is so interesting to see the decorations in other countries… your daybed is gorgeous and I love your grainsack pillows, I also use them in our garden chairs…
Warm greetins from Germany
Bine
Those are wonderful!
Great job on the pillows!
Your pillows are gorgeous. I’m inspired to create some of my own.
Love, love feed sack fabric. Thanks for stopping by. I am a new follower.
The daybed is gorgeous, and the pillows are so charming! I would never want to leave the porch!
Thanks for your kind comment on my ‘chocolate’ coffee table!
I love them!!!
Gorgeous! I’m a pillow fanatic myself, and I love seeing other people’s pillow designs. Simply lovely!
I love them! They are so chic. I pinned it so I can try it out later!
Can’t wait to make this! We have a ranch in La Grange that these would be perfect at. Thank you for sharing!
p.s. I’m your newest follower & fan <3
Kayli @ Head Over Heels